Showing posts with label craft. Show all posts

Thursday, March 22, 2018

Super Beads


My daughter is the craft queen of our home. She has an ever-growing collection of supplies and interests, so when we were able to review a product from Zirrly, I knew she would be ecstatic. After all, the company's goal is to offer "unique and entertaining crafts with an education advantage." They offer so many fun craft kits, and Super Beads are no exception. We had such a hard time deciding which one we'd like.

After much debate, we chose the Mega Pack so there would be plenty of beads for all the kids.

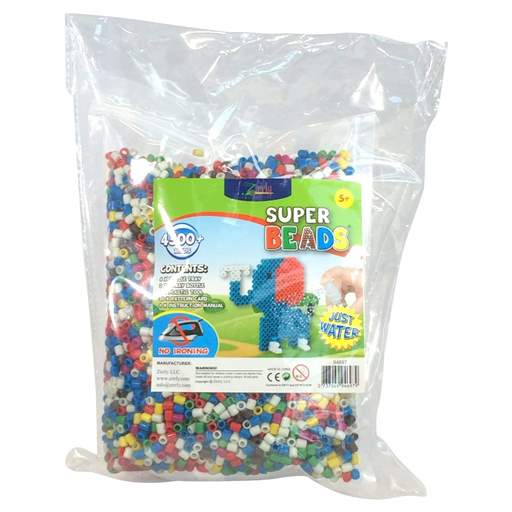
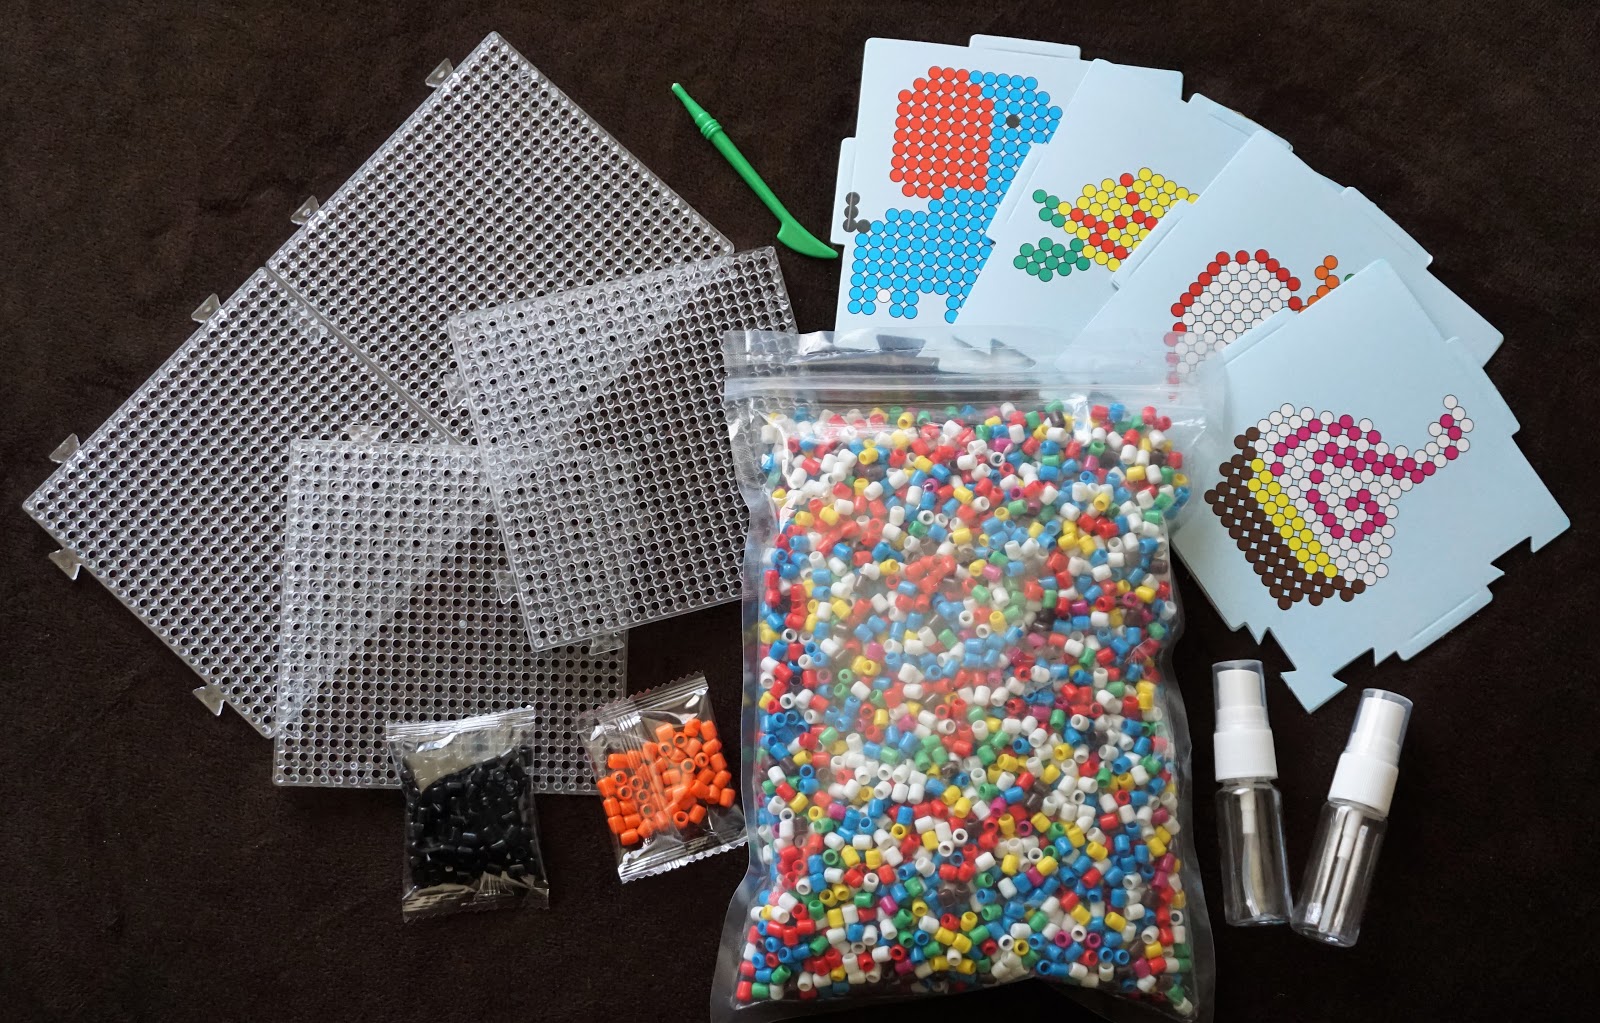
My girl eagerly checked the mail every day until the bag of goodies arrived. All the kids gathered around the table as we looked through the supplies.

  • 4,500 beads
  • 5x4 assorted design templates
  • 2 spray bottles
  • 4 boards
  • 1 design tool
  • instructions 


The Super Beads are a form of fuse beads. Instead of having to melt with a hot iron though, you spritz the beads with water to stick together. The process is safe and perfect with little ones to use on their own. Another aspect that makes these beads a good option is that they fit snugly on the board. If someone shakes the table or if your little brother bumps your arm, your creation stays in place. No more frustration after losing all your hard work! In fact, you can even pick the board up, flip it upside down, and the beads stay right where you put them.

My kids have been making all sorts of creations with the beads. Magnets, hair barrettes, coasters,  little trinkets--if you can think it, you can make it. If you need help getting started with an idea though, the 4 designs cards (elephant, turtle, apple, cupcake) are helpful. They fit perfectly under the boards and make it simple to match the colors on the card or modify them to your liking (just remember to take the template out before spraying the water). The boards themselves snap together, making it possible to make much larger creations, too.


After the Super Beads dry, you can gently pull them off the board. This part can be a little tricky, but if you place the beads down the correct way with the lined part at the top, it makes it much easier to remove than when they're flipped every which way (ask me how I know, ha). The creations are a bit rubbery and flexible, so they don't break easily. If part of it does happen to separate, all you need is another squirt of water and it's fixed.

These boards have the pegs lined up next to each other, instead of each row being offset. It makes it difficult to make smaller creations look proportionate. The way to change that though is to make the bulk of the design, remove it from the board after drying, and then set the additional pieces in place and respray. You can see examples below as the very top of the strawberry and some of the ends of the snowflake.


My kids and I all agree that these Super Beads are so fun! They are easy enough for little ones to assemble and spray and stay together really well. The Mega Pack is a great choice for little artists, but there are many other kits, as well, like the jewelry set, the spinning tops, a set of 3D vehicles, and more. The kits would make a great addition to an Easter basket or just a fun surprise for anytime.

Thank you, Zirrly, for this fun craft!


You can connect with Zirrly on the following social media sites:
Facebook
Pinterest
Instagram
YouTube


You can read more reviews of the various kits of Super Beads on the Homeschool Review Crew blog.


Crew Disclaimer
Pin It

Wednesday, March 21, 2018

Home School in the Woods


Our family gets excited every time we get to review for Home School in the Woods. Their products are detailed, hands-on, and so fun, making them well-loved history materials in our home. We've used their Project Passport titles for full curricula of both Egypt and the Middle Ages and studied the presidential election process with a Lap-Pak. This time though, we were introduced to one of their newest options--the À La Carte projects.

Home School in the Woods is a family business that was started as a way to make history real, understandable, and applicable. Using timelines and realistic illustrations as a foundation, they've created many resources to make learning history an enjoyable process.

While the full curricula options are fantastic, sometimes you just need a filler for another study or more information for a personal interest. Those are the times when the À La Carte activities are perfect. These resources are individual activities that are pulled directly from the larger curricula downloads of History Through the Ages. The projects include timelines, authentic crafts, lap booking, games creative writing, and much more. The hardest part is choosing which activities to get!


My house is filled with little boys, so pirates are a big deal around here. I knew my kiddos would enjoy the Pirate Panoply Game. This simple game teaches all about a pirate's clothing and accessories during the age of exploration. To play, you roll a die and dress your pirate with the assigned numbered article. Roll a 1, your pirate gets his hat. Roll a 5, and he gets his breeches. The first player to get fully dressed wins. This activity is for an unlimited number of players and was first found in Time Travelers: New World Explorers

This was an easy game for everyone and was enjoyed by the little ones all the way through the adults. It's a fast-paced game, too, so it is great for times when you have only a few minutes. The kids enjoyed coloring the various pieces and then mixing-and-matching them while dressing their pirates. Each time is a different combination.


Also part of that study is the Merchant Marauder File Folder Game. Though the two games originated from the same study which is geared toward 3rd-8th graders, this one is more for the older crowd. Players practice their math skills as they shop for items to set sail across the seas. They learn how to find the value of Spanish cobs as they pay with doubloons, pieces of eight, escudos, and reales. The first player to purchase five of his needed items wins.

This game is more complicated than the other. Trying to keep track of all the tiny pieces of cob was confusing and converting the types into what they needed could be frustrating. I would say this game is more appropriate for the 6th-8th grade crowd. The kids and I decided to change it up. Instead of making a player pay for an item, he automatically got it when he landed on it. This took the mathematical learning out of it, but made it more enjoyable for my kids. It was still just as exciting when they landed on an item they needed.


As soon as I saw The Art of Quilling (3D), I knew I needed to get it. My daughter loves crafts--and that's putting it mildly. She enjoys various arts from knitting to origami to drawing to sewing, but she had never tried paper quilling. This download, which was originally for the Time Travelers: Colonial Life, gives a history of the paper rolling art, when it was created, who mastered it, and which types of materials were used. It briefly explains how to do the art and what you can use if you don't have an actual quilling tool. There are instructions and pictures for forming 8 different shapes and tips for embellishment. There is also a quilling pattern included.

I purchased a quilling tool and then handed it and the instructions to my daughter. She was thrilled! She read the page and got right to work. The instructions are clear and easy enough for my new 10-year-old (today is her birthday!) to understand. She has had so much fun rolling the paper strips and creating designs. I do think the activity should include two more patterns though for the price.


All of the À La Carte projects include detailed instructions and tips for both printing and assembly. My only concern with the Home School in the Woods products in the past was the printing hassles. I was so excited to see that they now include the option for duplex printing! It didn't affect these materials specifically, but will make a huge difference for the bigger studies. Now I can say that I love everything about this company.

Home School in the Woods is a fantastic option for history learning. The À La Carte options are inexpensive enough to fit any budget. I'm already trying to decide which to use next. The Passover Seder Game to enhance our Easter study or The Penny Rug 3D Project to please my crafty girl or a Colonies Timeline to complement our current read aloud biography. No matter what, I know that the activity will be high quality and thoroughly enjoyed.


You can connect with Home School in the Woods on the following social media sites:


 You can read more reviews of the À La Carte products on the Homeschool Review Crew blog.

Crew Disclaimer
Pin It

Wednesday, November 8, 2017

Thin Stix Creativity Pack


My kids are so excited every time we get to review for The Pencil Grip, Inc.. They love arts and crafts and appreciate getting new supplies to make creations. The mess-free Kwik Stix are well-loved in our house by both kids and mom alike. The kids equally like the thinner version of the stix as well, but had only used the classic colors. You should have seen the looks on their faces when they opened the box with the Thin Stix Creativity Pack!

The Pencil Grip, Inc. was started in 1992 by Dr Lois Provda, an educational therapist. The company has been selling hundreds of unique and innovative products for the school, home, and office ever since. They offer the original ergonomic pencil grips that encourage proper writing skills, textured products that appeal to sensory-seeking kids, ultra-safe scissors, basic office supplies, and, of course, the Stix. 


The Thin Stix, just like the original Kwik Stix, are solid tempera paint sticks, but without the mess. That means we don't always have to pull out the paint, brushes, smocks, and cups whenever the kiddos want to create masterpieces. Don't get me wrong, my kids love traditional painting! But Mom doesn't always want to deal with the hassle. With these paint sticks, they can simply uncap, twist, and paint to their hearts' content. On top of that, the fast-drying formula of the stix though allows the color to dry in only 90 seconds!  Now we don't have paintings drying all over the house. The pages can simply be stacked in one neat pile. 

Even times when I would say no to a full-on painting session, I would never deny their requests for the Thin Stix. So quick and easy.  


The Stix remind me of a big tube of lipstick. The paint is waxy and slightly tacky. They silkily glide across the paper as you swipe. (I admit, it's a bit addicting!) Using them is more like coloring than painting though since you draw instead of brush the color around. The finish on the page is paint-like with a shimmery sheen, so the completed project looks like it was painted.

The Thin Stix are much slimmer than their original counterpart. Their size and length are similar to markers. They have slightly less paint inside (0.35 oz for the original, 0.21 oz for the thin). You can be more precise and accurate with the thin version.


Just like the regular Kwik Stix come in a variety of colors (classic, neon, and metalix,), the Thin Stix do, as well. All the colors are fun, but the shimmery metalix are my personal favorite, and given the fact that my kids "ration" the use of the gold and silver stix, I'd say they're their favorites, too, ha. 


We've used these to paint on all types of paper, coffee filters, popsicle sticks, wood, and styrofoam plates. They really are easy to use on just about any surface (just ask the 2-year-old how much fun it is to use these to paint on the kitchen table. Stinker.) This time we made sure to make some fall decorations to display on the windows. The kids and I had fun swirling the colors on pages. Then we flipped the pages over to draw leaves and cut them out. It was a fun surprise every time we turned them over to see how the patterns and colors came together.    

The Thin Stix Creativity Pack offers so many opportunities for creativity. If you're looking for a mess-free, fun, and easy form of art, these Kwix Stix may be just what you need.


You can connect with The Pencil Grip, Inc. on the following social media sites:
Facebook
Twitter 
Pinterest


You can find more art projects made with the Thin Stix Creativity Pack by reading the reviews on the Homeschool Review Crew blog.

Crew Disclaimer
Pin It

Wednesday, July 26, 2017

ACTÍVA


I have artsy kids, so anytime we can review art supplies is sure to be fun. Almost daily, someone is drawing, coloring, or folding origami creations, but it's not as often that we pull out the super messy supplies. The Rigid Wrap and CulluClay Quik-Sculpting Kit from ACTÍVA Products definitely falls into that get-your-hands-dirty category. Along with the kit, we received the ACTÍVA Products' Sculpture KIDS CRAFTS eBook that's filled with project ideas. 

ACTÍVA: Basic Materials for Creativity is a company that has been dedicated to quality arts and crafts supplies since 1959. They offer all sorts of materials from multiple types of air dry clay to plaster and molds for casting to colored sand and dried floral products and more. Along with their merchandise, their site is full of useful information like instructions, tips, techniques, and safety sheets. 


I knew the kids would be excited to start crafting as soon as the package arrived in the mail. I opened the box and immediately knew something was wrong. There was a white, powdery substance all over the kit and inside the shipping box. I carefully opened the kit to discover an even bigger mess. The CelluClay had a gaping hole in the clear, plastic packaging, causing the powder to cover the contents of the box. The two bags of Rigid Wrap, the instruction and project sheet pages, the remaining CelluClay, everything was a mess. I sent a quick email and received an equally quick reply. Within a few days, I received another kit, sans hole in the bag. Good customer service is always a plus for a company.

We really weren't sure what to expect with these products. I pulled up the free eBook and browsed through the ideas with the kids. My daughter (9 years) immediately was drawn to the bold beads made from Rigid Wrap plaster cloth strips. She loves making bead jewelry, so the ability to design her own beads was very appealing. The book lists skill level, time, materials, directions, and tips for each project. The directions for the beads was a little confusing, so it took some trial and error to figure it out. And though some of the beads were a little rough around the edges or bumpy and misshapen, that didn't stop her from exclaiming dozens of times how much fun she was having. She said, "I just can't stop making these!" Some more practice, I am sure her technique will improve and the bead-making addiction will be even stronger.


The boys, however, were not impressed with any of the suggestions in the book. (They were initially excited when I read "Deadly Dinosaur," but when they saw a friendly brontosaurus-type dino with a smile, they were disappointed.) They also did not prefer the projects that came in the kit either (which were mostly the same as the book and looks like a photocopy of a photocopy and blurry with one page so crooked that half of it was missing). Instead, they each decided on a project that we found while looking through the video demonstrations on the site. I found some old jars, gave the boys trays and bowls of water, and cut strips of Rigid Wrap. They got to work dipping the strips in water, removing the excess liquid, and wrapping the jar. My 7-year-old made his own (which he filled with roses and gave to his grandma, heart melt.) and my 11-year-old  helped his 5-year-old brother make one. (Make sure to check out the video at the end of the post he made of the process and see how easy it is to create your own!)

Both the beads and the vases dried quickly, but the kids didn't get a chance to paint them until the next day. That part was equally fun. I always like watching their creativity and differences as they design their masterpieces. The acrylic paints worked very well on the dried Rigid Wrap.


Next was trying to decide what to make with the CelluClay. This isn't a true clay, but rather an instant paper mache clay made from 100% pre-consumer recycled paper. Since no one wanted to recreate a project idea from the book, we brainstormed ideas and searched the web. It came as no surprise when we settled on a working volcano. (There is actually a volcano idea in the book, but it is a simple sculpture, and honestly, not what we were looking to make.) 

We enlisted the help of my husband to design the structure of the volcano. Then we used the CelluClay to coat it. This is where we ran into problems. There are no instructions whatsoever for the clay in the box. There's nothing on the bag. There's nothing in the eBook. There's not even anything in the description of the product on the website. Everything just says "mix the CelluClay in a Ziploc bag," but nothing is mentioned about amounts or process or anything. He did a search and found that it's recommended to use 32 oz of water to 1 lb of clay (which, I find a bit confusing, since the free eBook calls for 2.5 cups of clay for one of the projects. One is based on weight and the other volume. They're not interchangeable.) Just to be safe, we used 24 oz of water for our 1 lb, because you can always add water if needed, but you can't take away. Our oldest mixed the concoction, but instead of forming into a ball of clay, it stayed as a soupy pulp. It still worked to form the volcano, it was just sticky and messy and not clay-like. I enjoyed the process, but the kids did not like the feel of the goop. 


The volcano took a couple days to dry and the thicker parts finished off with the help of a fan. Next came a coat of spray paint, and our masterpiece was ready to erupt. The kids always enjoy watching the reaction of baking soda and vinegar. The CelluClay softened up again after multiple eruptions, and it seems that the vinegar has slightly eaten away at parts of the volcano, kinda giving it the feel of real lava destroying things in its path, ha. 
 
   
All in all, we love these products. I really hope they will improve their directions, both in the Rigid Wrap and CulluClay Quik-Sculpting Kit and in the ACTÍVA Products' Sculpture KIDS CRAFTS eBook. I did eventually find the full instructions on the website, but it took some searching around. I think it would be helpful if they linked to the instruction page on the product page. The Rigid Wrap was simple to use and the kids really enjoyed crafting with it. I'm eager to use the CelluClay again, with some tweaking of the amount of water. The possibilities of these products are endless!  


Here you can watch my 11-year-old create a vase with the Rigid Wrap. Super simple. And though the video is sped up, it only took him 7 minutes in real time to create it. You can see how he chose to wrap the top also, whereas his younger brother decided to leave it uncovered (in the vase and roses picture above). The best part of art is your creativity and uniqueness!


You can connect with ACTÍVA Products on the following social media sites:


You can read more reviews with fun projects made by kids on the Homeschool Review Crew blog.

Crew Disclaimer
Pin It

Thursday, May 5, 2016

The Pencil Grip, Inc. Review


My kiddos love to draw, paint, and make crafts. I love seeing their creativity, but don't always appreciate the mess that comes along with it. Some days you just need a no-mess form of fun, am I right? That's why we were excited to try Kwik Stix Neons 6 pk and Kwik Stix Metallix 6 pk. These crafting supplies from The Pencil Grip, Inc. are just what we need on the no-extra-mess-please days.

The Pencil Grip, Inc. was started in 1992 by Dr Lois Provda, an educational therapist. The company has been selling unique and innovative products for the school, home, and office ever since. They offer the original ergonomic pencil grips (like this one we received) that encourage proper writing skills, textured products that appeal to sensory-seeking kids, basic office supplies, and more.


The Kwik Stix are solid tempera paint sticks. Now, we don't always have to pull out the paint, brushes, smocks, and cups whenever the kiddos want to create masterpieces. With these paint sticks, they can simply uncap, twist, and paint to their hearts' content.

Not only does do the stix save on supplies, they save on space, too. If I have the four older kids sitting at the table and painting at the same time, we quickly accumulate dozens of wet, sticky pages. My counters are covered in these creations until they dry. The fast-drying formula of the stix though allows the color to dry in only 90 seconds. That means that the pages can be placed in one big pile, without compromising the picture. When a child completes a page, he can immediately add it to the top of the pile, instead of finding an empty place on the counter . . . or desk . . . or table . . . or anywhere else that isn't already covered with wet painted pictures.


The Kwik Stix remind me of glue sticks or a big tube of lipstick. The "paint" is waxy and slightly tacky. They silkily glide across the paper as you swipe. Using them is more like coloring than painting though since you draw instead of brush the color around. The finish on the page is paint-like with a shimmery sheen though, so the completed project looks like it was painted.
    
We've used these stix on paper, coffee filters, wood (like popsicle sticks), and styrofoam plates. The paint easily colors them all. My kids have been having so much fun creating crafts and pictures with these. They love being able to pull them out whenever they want. I love the versatility and lack of mess.


We also own the Kwik Stix 12 pk which contains regular colors like red, blue, black, and white. Having the original colors along with the neons and metallix means that the kids have lots of choices to create anything they can dream of.

Their favorite thing is simply painting on a blank page, but my favorite is the bouquet of coffee filter flowers they made to adorn the kitchen table. Not only are they pretty and fun to make, but they also won't die in a week!


These stix are convenient, easy-to-use, easy-to-store, and mess-free. We keep all of ours in a plastic box, so we can grab them whenever the kids feel the creative bug biting. We can take them outside, in the car, on vacation, or at the kitchen table. They're simple enough for even our one-year-old to color pictures, too (even though our boy doesn't, you do need to watch to make sure little ones don't put the stix in their mouths).

The Kwix Stix have been a huge hit in our house--with kids and mom alike! They have told me many times how much they like having the stix. If you're looking for a mess-free, fun, and easy form of art, these Kwix Stix may be just what you need.


You can connect with The Pencil Grip, Inc. on the following social media sites:
Facebook
Twitter
Pinterest


If you'd like to see more cool creations using the Kwik Stix paint, please read the reviews on the Schoolhouse Review Crew blog.

Crew Disclaimer
Pin It

Monday, April 29, 2013

Make it Monday: $2 Birdhouses

Erika asked me to make birdhouses with the kids last year, yes, last year. I, being a Maker and woodworker, loved the idea. Yet I still managed to forget about the request for a little while. Then one day it was brought up again and I hopped to it. I immediately turned to my favorite DIY site, instructables.com, for ideas. One of the first returns on my search was the $2 Birdhouse posted by CheapChuck. A simple birdhouse that didn't cost much, but still did what we wanted. I knew instantly what birdhouse we were making.

The basis for this birdhouse, or our building material is simple. You need one, yes one, five to six foot long dog-eared cedar fence picket. Small disclaimer: in the instructable the house is referred to as a $2 house but my local Home Depot charges $2.25 for the picket, but I still think it is a cheap build. They do sell a $1.18 pine picket, but that one is treated. Not very bird friendly. Plus cedar is a good outdoor, low maintenance building material. Anything else you need you can probably find in your workroom. I did.

So last year I went and got three, we have three kids old enough to make houses, cedar pickets. I spent a few minutes one evening cutting out all the pieces. You need two peaked, end wall panels, two side wall panels and two roof panels. The floor panel you wait to cut out until you put the rest together so that you can measure what you need.

I also trimmed one of the roof panels for each house along its width equal to the thickness of the board. This allows for a symmetrical look to the finished roof.
Cutting it all out really wasn't difficult. Getting around to putting the houses together, now that's a different story. We didn't get around to making them last year before the birds nested. So I intended to get them together for this years nesting. Still not entirely sure if I managed that, but they're together none the less.

To construct these I used exterior wood glue, 18 gauge brad nailer, hammer, drill with 3/32", 1/4" and 1 1/4" bits. I have to admit, I had to buy exterior wood glue since all I generally use is interior, but that is not much cost added to the project. When it came time I covered the kitchen table with newspaper, and ran my air hose in from the porch. I called the kids in and we began assembling birdhouses.
We started by assembling the four walls. A peaked wall goes at either end with the rectangular walls between them. Apply glue to the edge of the rectangle wall, align with the peaked piece, and give it a couple of nails from the gun. If you are going classic with a hammer and nails I recommend pre-drilling the holes so as not to split any wood.

There was no problem getting the kids to help with the gluing process, they're used to that. But the nail gun brought fear to their eyes. It's new to them and loud, none of them like how loud my tools are. I do appreciate their fear of the tools though. It will help them learn to respect how dangerous they can be and the proper way of using them.
From the walls you move to the roof, putting on the piece you trimmed first. Apply your glue on one side of your peaked walls. Align the edge of the roof piece with the other peak surface to create an even surface for the other, wider piece to sit on. Nail again.
And this is when the battery in the camera died. Not too many more pictures were taken. I apologize for that. I plan to make another house with a clear rear wall. At that time I'll take more pictures of the process. We're hoping that we can mount that house someplace close to a window so we can observe what is happening inside.

Once that side of the roof is secured you can apply glue for the other side. Make sure you put plenty along the top ridge so that it will create somewhat of a seal from rain when it dries. Place the piece and nail again. Once the roof is in place you can work on your entrance. I drilled a 1 1/4" hole center on the front in line with the bottom of the roof. Make sure to sand both sides of the entrance so has to help avoid a splintered bird. Before you drill that hole though, mark the spot for a perch two inches below the center of the entrance. I used a 1/4" drill and inserted a sanded 1/4" dowel roughly three inches long.

Now for the bottom. This will also be your entrance to clean the house out once the occupants leave. Yes, just like human renters, these users do not clean up after themselves. Cut you base leaving yourself about an 1/8" around the perimeter, 1/4" smaller than what the house measures. On one end cut or sand a 45 degree angle off the bottom so the panel can hinge out for cleaning.
Pre-drill holes for a standard nail, I used a 6d 2" nail on either side as my hinge. A 3/32" bit made a hole just the right size so I could simply push the nail in with almost no hammer use. On the other end of the base I drilled a hole the size of which I do not remember and insert a standard coarse thread drywall screw to hold the floor up. When it comes time to clean the home I will remove this screw and swing the bottom out and allow the contents to empty.
Yes the kids did help me with this project in between trips to the living room to slide on a big cardboard box they had been playing with. I still get a little nervous having them run power tools so I do a lot of that for them, but I try to get their hands on the tool while I am doing it.
What they had fun with was painting them. I was not at home for this process, but it was something they can do mostly on their own. So with no one hindering what they had to do, they went wild painting them however they felt.
Well, our kids had fun making our "$2" birdhouses, and if I manage to get them up in time some birds will enjoy them. How about you, want to give your kids, or yourself, a good time and a couple of birds someplace cozy to stay for a while?

Pin It