Showing posts with label dough. Show all posts

Tuesday, December 3, 2013

Tasty Tuesday: Apple Pie Tartlets

I think these apple pie tartlets are pretty much perfect--all the goodness of apple pie in a cute, little two-bite form. 

The only problem? 

They're so dangerous! With a whole pie, you have to commit yourself to sitting down and eating a slice, but with these tarlets, you can just grab one as you walk by. I mean, it's just a teeny, tiny, bit of pie. No harm, right? Right. Until you've eaten six. 

They're dangerous, I tell ya.       


I prefer jonamac apples for these. The rich sweet-spicy taste makes the tartlets burst with flavor. And because jonamacs break down while baking, they produce more melting juices that, when combined with the flour, make a nice, gooey appley gel to hold it all together.

And what could be better than that?


These tarlets are a favorite in our house. They take a little bit more time than making a traditional streusel-topped pie, but they are totally worth it.

And remember, since they're small, you can eat more!

Enjoy!


Pie Crust 
Ingredients:
½ cup shortening 
1½ cups flour
½ teaspoon salt
½ cup ice cold water

Directions:
1. Mix shortening, flour, and salt together in a food processor with a dough blade (or in a bowl with a fork or a pastry blender) until very crumbly. Add as much water as needed to hold together and mix until combined. Place the dough in the freezer for 5 minutes.
2. Roll dough gently on a floured pastry mat to about ¼ inch thickness and cut portions using a flower (or 2-inch round) cookie cutter. Gently press dough flowers into the wells of a mini cupcake/tarlet pan. Continue rolling the scraps of dough and cutting flowers until gone. If the dough gets warm and hard to use, place it back in the freezer for 5 minutes.    
   
Pie Filling
Ingredients:
2½ cups apples - peeled, cored and diced
¼ cup white sugar
¼ tsp cinnamon
⅛ tsp nutmeg
1 tbsp flour
2 tbsp white sugar
2 tbsp brown sugar

Directions:
Mix all ingredients together and fill tartlets.

Streusel Topping
Ingredients:
¾ flour
⅓ white sugar
½ cinnamon
6 tbsp butter

Directions:
1. Mix flour, sugar, and cinnamon together. Cut in butter until crumbly. Sprinkle on top of the pie filling.
2. Bake tartlets at 350° F for 20 minutes, or until the edges of the flower petals are just beginning to brown. Cool for 10 minutes in the pan, before removing to a wire rack to cool completely.
Pin It

Tuesday, December 13, 2011

Make It Monday: Gingerbread Play Dough

The kids and I baked up a batch of gingerbread cookies. But instead of cookie dough, we used play dough; and in place of the sprinkles we used googly eyes and beads. And technically, instead of baking we smashed them up to make them again and again! Either way, the house smelled delicious!


 They were so excited to make the dough. We even had a couple extra helpers.


Dump the dry ingredients into a bowl. Jake was impressed by how pretty it looked with the different shades of brown.


Use your big strong muscles to mix it up.


 Add the wet ingredients.


 Combine well. Once it gets too thick to mix with the spoon, knead the dough with your hands.


They had a very hard time waiting until the dough was completely cool before they started cookie preparations. In fact, they didn't wait. They dough was still slightly warm when they first rolled out their dough and began cutting their shapes.


We had our very own bakery setup in the kitchen. 


 We baked up some traditional gingerbread men . . .


 and Christmas trees.


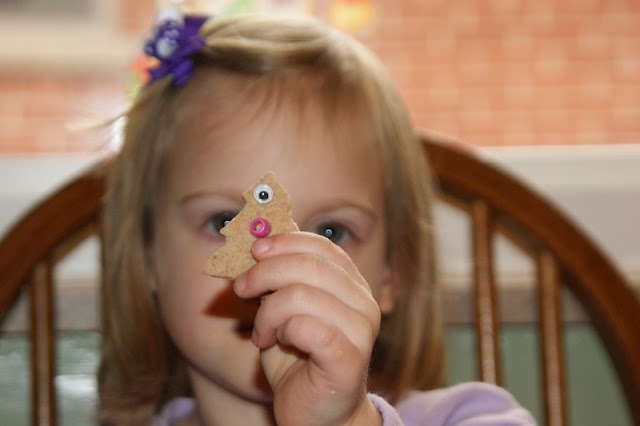
And some not-so-traditional cyclops trees with pink bellybuttons . . .


 and even a pet rock cookie.


We certainly have been busy. We are now officially open for business and taking orders for all your Christmas needs! 


The kids (ok, me too!) had so much fun rolling, cutting, and decorating our "cookies." They really did look and smell like the real things. Jake asked a few different times, "Can we bake these for real? They smell so good!" A tablespoon or two of some of these spices might be a little costly to be used for something like play dough, but I expect it to last a long time. In fact, the play dough we made last year is just about on its last leg. It's survived 3 kids for over a year. Definitely cost effective. I actually ended up finishing off a few of our spices to make this dough, so I'd better add them to the grocery list for our annual baking extravaganza coming up! Besides, now we'll have fresh spices for our real baked goods.

My favorite part was a conversation that took place between the 2 kids -
Jake: "Look, the candy canes look like J's for Jesus."
Alyssa: "And for Jacob!"
Jake: "Yeah, but Christmas isn't about me. It's all about Jesus."
And he couldn't be more right.


Gingerbread Play Dough
Ingredients:
2 c flour                                           1 Tbs cinnamon
1 c salt                                            1 Tbs nutmeg
2 Tbs cream of tartar                      2 Tbs vegetable oil
2 Tbs ginger                                    1 1/2  c boiling water

Directions:
1. Mix all the dry ingredients in a bowl.
2. Add in the vegetable oil and boiling water.
3. Mix well. Once the mixture becomes too thick to stir with a spoon, use your hands to knead it until it is soft and thoroughly combined.
4. Allow mixture to cool before playing.
Pin It

Sunday, March 20, 2011

Leftover Pie Dough

Ever wonder what to do with that leftover pie dough? God forbid you throw it away! Usually, we roll it out, pour sprinkles on, and bake it like a big cookie. It's kinda dry though, and not overly tasty. The other day, when we made lemon meringue pie, I used the leftover dough in my mini tart pan. I finally got to use my mini  tart shaper from Pampered Chef! Once the tartlets were cooled, we filled them with Reddi Whip. So easy. So yummy. No more dry, flaky pie-cookies here!


Pin It

Wednesday, December 15, 2010

Make It Monday: Christmas Dough Ornaments

This was week number 2 for Christmas ornaments. Really though, can you ever have enough homemade decorations hanging on the tree? (My opinion might change in a decade or so!) It's fun pulling things out of the box and seeing how the kids' abilities increase over the years. They feel a sense of pride knowing that they made them.

Ingredients:
4 cups all-purpose flour
1 cup salt
1 1/2 cups warm water

Directions:
1. Preheat oven to 250 degrees F.
2. Mix flour and salt well. Gradually add water, stirring with a large spoon. Finish mixing with hands. Knead until soft and pliable.
3. Roll out on floured surface about 1/8 inch thick. Cut shapes with cookie cutters. Place on cookie sheets. With a toothpick make a hole in the top of the ornament for threading string. Bake at 250 degrees F until hard, about 1 1/2 hours. Decorate with paint and varnish to preserve.

We made half a batch for the two of them. We added a bit of cloves and cinnamon to the dough in hopes that it would give us scented ornaments. It made the house smell wonderful, but you can barely smell it on the ornaments.

Alyssa made the dough.

Jake rolled it out.

They both enjoyed cutting out the shapes.

They rolled it out and cut it, and rolled it and cut it, and rolled it . . . . and eventually just played with the last little bit while the "cookies" were baking. Rarely are children patient enough to wait for freshly baked cookies. It was so much worse this time, since they had to wait for them to completely cool before they could start painting.  They asked every few minutes, "Are they cool now? Are they cool? Can we paint them now?" 

They matched the paint brush colors to the paint colors. They are so my kids.

Glitter!
Our Little Artists

He did very well making stripes.

They had so much fun painting their ornaments! While the paint was still wet, they sprinkled on glitter. They each had their own paper plate to paint on. This way, all the paint and glitter was contained in one place instead of all over the table and floor. Plus, they enjoyed painting the plates once the ornaments were done. Double bonus. Once they were dry, we glued on various beads and embellishments. I covered them with polyurethane and added a string to the top.


Merry Christmas!

After they were all done, Jake said, "We need to put our name and date on it." It's a good thing I have him around. I just may have forgotten that part.

Pin It