Showing posts with label Oreos. Show all posts

Tuesday, March 13, 2012

Tasty Tuesday: Mock Shamrock & Mint Oreo Shakes

March is a wonderful month. The weather warms up. The ground starts to thaw. The birds return and chirp. The flowers begin to grow.  Green shows all around. My little girl celebrates her birthday.

Yes, all those things are wonderful. But the best part though? Shamrock shakes. It's true. I love them. The creaminess, the mintiness, the yumminess. Mmmm. What I don't love is that McDonald's never seems to have them. Oh, sure, they have the picture on the menu, but every time we go, they're out. Do you know how frustrating that is?!? We don't even eat at McDonald's but a couple times a year!  We've made special trips in the month of March though for the beloved Shamrock Shake. Do I want to substitute it for a strawberry shake? Nooo. How about a vanilla? Nope. Not even a chocolate shake can compete with my Shamrock. Sigh, we don't even bother anymore. 

What's a girl to do???

Why, make her own, of course! Why didn't I think of that sooner? We make our own shakes all the time. It's one of the kids' favorite treats on Sunday nights after church. We buy a big tub of cheap ice cream from the store for practically the same price as a single shake from a restaurant. Each one gets to choose which flavor he'd like. Some nights, I make 4 different flavors. It's quick, cheap, and makes everyone happy. Oh, yeah, they're delicious, too.   

So, the moment you've all been waiting for . . . the homemade Shamrock Shake ~ always in stock, always worth the price.


1. Dump all ingredients into a blender.
2. Place lid on blender (unless you'd like a show with your shake.) 
3. Blend.

Following me so far?


Pour into a glass, garnish, and enjoy!

Oh. My. Goodness. Soooo yummy! No longer do I have to wait for March. No more do I needlessly venture into McDonald's. Never again do I have to be disappointed at the lack of minty shakes! I now have my own mock shamrock. (Or maybe I should call it a sham shamrock? Or just a sham-sham shake. Say that 10 times fast!)

I wasn't sure if Jake would like it. He's not too keen on minty things. Let me tell you, he loved it! He has told me multiple times how yummy it was and asked when I can make it again. The other 2 kids gobbled it up as well. Their daddy, on the other hand . . . he liked the initial flavor, but not the aftertaste. Don't worry, I'm not offended. He's also not a big fan of mint. He'd rather use vanilla or orange toothpaste. Now, that's weird. And lest you think I deprived him of a shake just because he's weird and doesn't like mint, I'll tell you that I made him a fresh strawberry shake instead. 

Anyway, the only thing that could make this mock shake better is to turn it into my all-time favorite shake/ice cream -- mint Oreo. (Now do you see why I don't let my kids eat the mint Oreo cookies when I buy them???)  Another place we go maybe twice a year is Dairy Queen. (Are you starting to get the picture that we don't go out much? 'Cause we don't.) I don't know why I bother to look at the menu. Maybe to see if something else catches my attention. Maybe to make the employees feel good about the yummy pictures behind them. Maybe because it's what I'm supposed to do. It doesn't matter. I always get the same thing - mint Oreo blizzard. Such a risk-taker I am.


To make your own, back up to step 1 in the Shamrock directions and add crushed Oreos (even better if you use homemade ones.) Proceed as directed, lid on and all. Then, after you pour it into the glass, place it in the freezer for 30 minutes to soften the cookie pieces.

Perfection. 

You know what makes this shake better than one you can buy? No, it's not the convenience. No, it's not the price. No, it's not even that you know what ingredients are in there. It's because you can add as many cookies to the mix as you want. And nothing is better than that.


* I do not use measurements when I make shakes. I just pour, plop, blend, taste, adjust, blend, taste . . . Below are the amounts I used to make these shakes. Our ice cream was pretty soft, so I didn't need much milk. Adjust the amounts according to your personal consistency preference.

Mock Shamrock Shake
Ingredients: 
4 scoops vanilla ice cream                                        
1/2 c milk
1/4 tsp mint extract
8-10 drops green food coloring

Directions:
1. Blend ingredients until smooth. Adjust ingredients, as desired.
2. Pour into 2 glasses. 
3. Garnish.


Mint Oreo Shake
Ingredients: 
4 scoops vanilla ice cream                                        
1/2 c milk
5 crushed Oreo cookies
1/4 tsp mint extract
8-10 drops green food coloring

Directions:
1. Blend ingredients until smooth. Adjust ingredients, as desired.
2. Pour into 2 glasses. 
3. Freeze for 30 minutes.
4. Garnish.
Pin It

Wednesday, March 7, 2012

Tasty Tuesday: Double-Stuffed Fauxreo Cookies

Oreo turned 100 years old! Even though the cookies have some wrinkles, break easily, and are squishy in the middle, I'd say they aged rather well. Not only are they "milk's favorite cookie," they're my favorite processed cookie as well. Whether it's the traditional cream filling (double-stuffed, of course) or the very berry, peanut butter, chocolate, or golden, I'll eat them. I've already confessed my secret about the mint ones. Oreo has lasted the test of time. It's the only cookie I'll dunk in milk - and that's saying a lot. I have never liked milk. We didn't drink it while growing up. (Not much nutritional value in it. You can get more calcium from leafy green vegetables.) In fact, I disliked milk so much that I poured water over my cereal and dunked my cookies in water as well. Weird? Yeah, pretty much. I've since gotten over my complete hatred of the white stuff enough to use a little to moisten my cereal. And of course, dunk my precious cookies.


Speaking of dunking cookies, Oreos are not just for plain white milk. Have you ever tried Oreos in chocolate milk? Hot chocolate?? Or my favorite, coffee??? Mmm, you just can't go wrong with the Oreo.

And any good food that you can buy at the store or a restaurant has a copy-cat recipe. Oreo is no exception.


Dump the first 8 ingredients into your stand mixer. If you don't have a stand mixer, buy one.

Or use a hand-held mixer.

Or use a spoon and good ol' man-power if you're trying to build muscle strength in one arm.


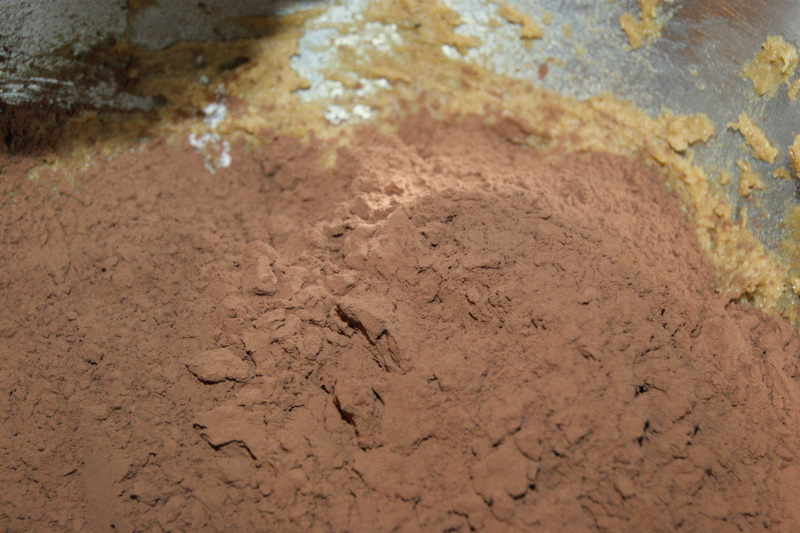
After the addition of the egg yolks, add the flour and cocoa powder. Mix well.

You'll have to use your hands to mash it into a smooth ball. That's half the fun.


Roll the dough onto a cocoa-powdered surface. This will ensure you don't end up with flour-dusted cookies. No one wants floury Oreos. No one.


Use a cookie cutter to cut your cookies. (Original, huh?) Bonus points if you have a stamp on one hand and the remains of a temporary tattoo on the other. Definitely makes the cookies taste better.

Jake said it was just like playing with play dough. I agree. The consistency was definitely like the cooked regular and the uncooked gingerbread play doughs we've made. The stiffness of this dough helps the cookie disks to keep their shape while baking. They don't spread and don't puff.


After 3 times of rolling and cutting, the dough lost its mushability. (Don't worry, that's totally a word.) It got dry and cracky. We used that last 1/3 cup for the piping. (I know we could have made more cookies out of the scraps, but I didn't feel like fighting with the dough.)

Yes, this recipe definitely makes a mess. Embrace it.


Add 1 teaspoon of hot water and mix it up. Continue adding water until it gets to the proper piping consistency.

 
I stopped with 3 1/2 teaspoons water and transferred the mixture to a pastry bag. Normally, I would use my dessert decorator, but I knew I needed more control. I learned 3 things:

1. I am not a cake decorator. (If you need one of those, call up my sis-in-law. She's amazing!)
2. My pastry bag felt neglected and was holding a grudge. My hand got really tired from trying to squish the thick substance many times.
3. It was super simple once I added another 1/2 teaspoon hot water.

Moral of the story: make sure you have the proper consistency for piping. In this case, 4 teaspoons was perfect.


Once the cookies are baked and cooled. Whip up your cream filling. Please try not to eat the whole bowl before assembling the cookies.

And try your best to keep the kids from eating it all, too.  Because, trust me, they'll try.

Fill up a pastry bag with whatever cream substance you can manage to salvage from the children. I think my pastry bag may have forgiven me by this point. It was a much easier process to swirl on the filling.

You really don't have to worry about it being pretty though. You're just going to smash another cookie on top of all your hard work.

The most important thing to remember is be generous with the cream!!!


 And there you have it - homemade fauxreo cookies!


Many of ours ended up being a little on the thick side. I realized after taking a crunchy bite that the wafers were more like 1/4 inch. I could blame it on having 3 little kids helping me roll and cut the dough, but that might not be entirely fair. Maybe I was distracted. Maybe I wasn't paying close enough attention. Maybe I just can't read a ruler.

Don't be like me. Make your wafers 1/8 inch. Please and thank you.


The cookies, though a little larger than real Oreos, are still pretty stinkin' delicious. Especially when dunked.


Little Zachy had no desire to dunk his though. He immediately treated this homemade confection just like the processed goodies - pulling apart the 2 halves, licking out the cream filling, and leaving the cookies untouched.

What kind of cookie eater are you? Do you separate the halves and enjoy just the filling? Do you eat the 2 components separately? Or are you a dunker? There's really no wrong way to eat an Oreo. Wait, hasn't that already been coined???


Happy Birthday, Oreo! Thank you for being so delicious!


Double-Stuffed Fauxreo Cookies
Chocolate Wafers
Ingredients:
6 Tbsp  butter, room temperature                                    1/2 tsp espresso powder
1/2 c  sugar                                                                      1 1/2 tsp vanilla extract
1/3 c brown sugar                                                            2 egg yolks
1 1/2 tsp salt                                                                     3/4 c + 1 Tbsp flour, sifted
3/8 tsp baking powder                                                      1 c cocoa powder, sifted
1/4 tsp baking soda                                                          few tsp hot water

Directions:
1. In a large bowl, cream together the butter, white sugar, brown sugar, salt, baking powder, baking soda, espresso powder and vanilla until thoroughly mixed. With the mixer still running, add in the egg yolks one at a time, scraping the sides of the bowl with a rubber spatula well after each addition.
2. After the yolks have all been incorporated, add the flour and cocoa. Mix on low speed until uniform and stiff. Scrape the sides of the bowl using a rubber spatula and knead a few times to form a smooth ball. Flatten into a disc. At this point, the dough may be rolled right away or wrapped in plastic wrap and refrigerated for up to a week. If you choose to refrigerate the dough, make sure you allow it to soften at room temp before rolling.
3. Preheat oven to 350F. Dust the counter with cocoa powder and roll the dough to a thickness of 1/8". When the dough has been rolled, loosen it from the counter with a spatula to prevent sticking.
4. Using a 2" (ours was 1 3/4" and close to the size of a real Oreo) round cutter, cut out as many cookies as you can. Use a spatula to place them on an ungreased baking sheet. Re-roll scraps as needed.
5. Place remaining scraps into a mixing bowl. Add 1 tsp of hot water and mix thoroughly. Continue adding more hot water, a teaspoon at a time, until you reach a piping consistency.
6. Transfer the softened dough to a piping bag fitted with a very small tip and pipe your preferred decoration onto the cut rounds.
7. Bake the cookies for about 12 minutes, or until slightly firm to the touch. Do not overcook. Once the cookies have baked, set the baking sheet on a rack and cool thoroughly. Use a spatula to pop the cookies off the sheet.


Filling
Ingredients:
1/2 c shortening                                                               2 tsp vanilla
1 3/4 c powdered sugar, sifted                                        1/4 tsp salt

Directions:
1. Cream together the shortening, powdered sugar, vanilla, and salt until very light and fluffy, scraping the sides of the bowl to incorporate fully. Transfer to a pastry bag fitted with a medium-sized round tip.
2. Flip half the cookies upside down and pipe a spiral of frosting onto the upside down cookies. Top with another cookie and press gently to seal. Transfer prepared cookies to a sealed container and refrigerate for a few hours to set the frosting and bond the wafers.


Recipe adapted from Whisk Kid.
Pin It