Showing posts with label cookies. Show all posts

Monday, August 19, 2019

Things That Make Me Smile 12/14/18

* This post may contain affiliate links.


Jake (13), Alyssa (10 1/2), Zac (9), Tyler (6 1/2), Nicholas (4)


Happy Monday! This list of Smiles covers the first half of December 2018. It's been fun looking back through all the fun of the holidays. So many reasons to stop, be thankful, and smile.


1, Nicholas, randomly and with no other explanation: "I watched two things at Gramma's: this and the other thing."

2. We celebrated Jake becoming a teenager! He requested a variation of our Boston cream pie. Instead of chocolate ganache, he chose a cooked caramel icing for the top.


3. Nicholas: "What can I eat?"
Me: "We're going to eat dinner when Daddy gets home."
Nicholas: "What's for dinner?"
Me: "Soup."
Nicholas, with a big smile: "I have a headache, Mom. Can I not eat soup?"

4. Decorating the house for Christmas with our annual traditions: a warm drink (this year was hot chocolate with fresh whipped cream), festive music, and homemade gingersnaps.


5. Zac: "You're the best mom ever!"
Me: "All because I let you have hot chocolate?"
Zac: "No, because of your baking and because of who you are."

6. Me: "Stop growing up."
Nicholas: "Yes, sir."

7. Nicholas didn't like my answer so he told me he was the mom and I was the boy. I got to play while he did chores. He was having too much fun washing dishes and doing laundry. He kept calling himself "Mama Nicky."


8. Tyler, eating a homemade cookie still warm from the oven: "Mom, I'm glad God made you!"

9. While playing Pictionary during our monthly Game Schooling Day, Zac drew a cross covered in flames. His word was crossfire.

10. Nicholas, trying to say rhino: "A hippopotamus is a wino."

11. Making and decorating sugar cookies as a family.


12. Me: "Is it almost your birthday?"
Nicholas: "Yes!"
Me: "How old are you going to be?"
Nicholas: "5."
Me: "What happened to 4? 1, 2, 3, 4, 5."
Nicholas: "I don't want to do it like that."

13. Nicholas, listening to Tyler explain something: "This is confusicating."

14. Nicholas turned 4 years old. He got a big boy LEGO set and a set of Brain Flakes.


What made you Smile this week?


* Some of the links in the content above are affiliate links. If you click on a link and purchase an item, I may receive an affiliate commission. Regardless, I recommend products or services that I have used personally and all the text and opinions are my own. I am disclosing this in accordance with the Federal Trade Commission's 16 CFR, Part 225.
Pin It

Saturday, April 14, 2018

Lactation Cookies

* This post may contain affiliate links. 


Have you ever heard of lactation cookies?

I admit, the first time I heard of these cookies many years ago, I thought they had breast milk as one of the ingredients.

Nope. Not the case.

In actuality, they're cookies eaten to increase milk supply and are full of all sorts of healthy goodness.

A cookie that's good for baby and good for me??? Yes, please! (Really though, you had me at cookie.)


I nursed my babies a total of 89 months. That's nearly 7 1/2 years of breastfeeding.

God designed women's bodies in a miraculous way. Most times, if a mom is exclusively breastfeeding, she will be able to produce sufficient milk for her baby. Sometimes though, she might need a boost in her supply. And who could turn down cookies if they're going to help you feed your baby, right?

These cookies contain galactagogues that are believed to increase milk supply: oats, flaxseed, and brewer's yeast. They have iron, fiber, omega-3, vitamin B, and many other nutritional benefits and healthy calories that are not only good for nursing moms, but the whole family, as well. I still make these cookies for my family, especially during road trips. It gives everyone a bit of a treat during the drive without completely loading up on sugar and helps them stay fuller longer because of the whole grain oats. And if you're looking for an even healthier snack, you can cut back on the sugar, too. In fact, these are so versatile that you can change it up based on what you have on hand. Toss in some extra nuts and seeds, swap the almond butter for peanut butter, increase any of the galactagogues, use semi-sweet or dark chocolate chips, add in some wheat germ, or even substitute all-purpose flour for the whole wheat. My crew isn't crazy about big chunks of nuts in their baked goods, so I pulverize them (the nuts, not the family, ha) in my food processor. That way we still get the flavor and nutritional benefits.


The cookies are soft, but dense, and full of flavor. They freeze beautifully (both raw and baked) and are a perfect gift to take to a new mom to help her boost her milk and give her a healthier snack to grab during those crazy first few weeks with a newborn. The recipe makes about 4 dozen, so there's plenty to share with the new mama and some leftover for yourself.

Or just do what I do and make a double recipe. Because if your family is anything like mine, these cookies won't last long.


Lactation Cookies
Ingredients:
1 1/2 cups whole wheat flour                   
1 teaspoon baking soda                                       
1 teaspoon cinnamon                                     
1 teaspoon salt                                                 
3/4 cup almond butter (or peanut butter)                               
1/2 cup butter, softened                         
1/4 cup sugar                                         
1/2 cup brown sugar                               
1 teaspoon vanilla extract
3 tablespoons brewer’s yeast
1 cup milled (ground) flaxseed
1/3 cup water
2 eggs
1 cup chopped nuts
1 cup chocolate chips
1 3/4 cup rolled oats

Directions:
1. Sift flour, baking soda, cinnamon and salt in a bowl.
2. In a large bowl, beat peanut butter, butter, sugar, brown sugar, vanilla, brewer’s yeast, flaxseed, and water until creamy.
3. Mix in eggs.
4. Gradually beat in flour mixture.
5. Mix in nuts and chocolate chips. Slowly mix in oats.
6. Place tablespoon-sized balls of dough (I use a cookie scoop) onto ungreased cookie sheets and lightly press down each ball.
7. Bake 12-13 minutes at 350°F.


Recipe adapted from Kathleen Major, PNP, RN.

* Some of the links in the content above are affiliate links. If you click on a link and purchase an item, I may receive an affiliate commission. Regardless, I recommend products or services that I have used personally and all the text and opinions are my own. I am disclosing this in accordance with the Federal Trade Commission's 16 


Homeschool Review Crew Weekly Link Up
Pin It

Tuesday, November 4, 2014

Tasty Tuesday: Pumpkin Chocolate Chip Cookies


Every Thursday, my friend Karen from Tots and Me hosts Throwback Thursday Blog-Style. When she first started it, I thought it was a great idea. It's so fun looking back through old posts, seeing older pictures of the kids and remembering some activities that we've done. It's also a good way to connect with other bloggers. 

This past week, she personally shared a recipe for pumpkin chocolate chip cookies. I knew immediately that I wanted to try them. We make pumpkin cookies every fall and coat them with a simple icing. We've made them so many times that I thought for sure that the recipe was here on the blog. I was shocked to discover that they're not and will remedy that eventually. And though I had been craving our pumpkin cookies the last couple weeks, the idea of adding chocolate to the pumpkin goodness instead of the vanilla icing on top was very appealing. I grabbed some butter out of the fridge to start softening. As soon as the schoolwork was done for the day, we got to baking.


Oh, let me tell you, these cookies did not disappoint! As with any cookie, we had to taste them just minutes out of the oven. Soft cake-like texture, gooey melted chocolate chips, and a hint of pumpkiny flavor. It's a good thing we made 5-6 dozen, because these kids of mine were inhaling them. I'm sure they would have gobbled down nearly all of them that first day had I let them. 

Yeah, they're that good. These are cookies that we'll be making again.


Pumpkin Chocolate Chip Cookies
Ingredients:
5 cups flour
2 tsp baking soda
2 tsp baking powder
2 tsp cinnamon
2 tsp nutmeg
1 tsp salt
3 cups sugar
1 cup butter, softened
1 can (15 oz) pumpkin
2 eggs
2 tsp vanilla
2 cups chocolate chips

Directions:
1. Sift flour, baking soda, baking powder, cinnamon, nutmeg, and salt in a large bowl and set aside.
2. Cream the butter and sugar. Add pumpkin, eggs, and vanilla and mix well.
3. Slowly add in the flour mixture until combined. Stir in chocolate chips.
4. Drop dough onto baking sheet. (I used my large cookie scoop, about 2 tablespoons.) Bake at 350* for 14-18 minutes. Let cool on baking sheet for 2 minutes before transferring to cooling rack.    

Recipe adapted from Tots and Me.

Pin It

Tuesday, September 30, 2014

Tasty Tuesday: Maple-Filled Pumpkin Spice Spritz Cookies

I am so excited that it's fall! This is my favorite season for so many reasons, but especially for the flavors: apples, pumpkins, cinnamon, nutmeg. Within the past few weeks we've already made pumpkin bread a few times and zucchini muffins. And cinnamon swirl bread, but we make that year-round. With all the bread baking, we were needing a change. These cookies were the perfect solution.


Not only do they taste yummy with just a hint of pumpkin spice, but look how adorable they are! The kids love whenever we pull out the cookie press. Treats are even more fun when they're in cute little shapes.

I love how the end of one color bled into the beginning of the new one in some of the cookies. I think it would be really pretty to fill the cookie press alternating the different colors. It would make wonderful multicolored leaves--perfect for fall!


While the cookies themselves are not quite as buttery as our typical spritz recipe, they make up for it with the maple filling. To me, they taste just like the maple cookies my grandparents used to buy in the bulk section of the grocery store. Leighton said they taste like a cross between pancakes and waffles. Haha, I guess the maple filling just means that we can eat these for breakfast!

Because you don't need a lot of filling for the cookies, I used the leftover goodness to frost a loaf of that cinnamon swirl bread I was talking about. And, yes, I most definitely ate a piece of that with my coffee for breakfast!


Whether you prefer these cookies by themselves or filled with maple goodness, why not make a batch to celebrate fall.


Pumpkin Spice Spritz Cookies
 Ingredients:
1 cup (16 tablespoons) butter softened
1 cup powdered sugar
1 egg
1 teaspoon vanilla extract
2 1/4 cup flour
1 teaspoon baking powder
1 teaspoon pumpkin pie spice
 food coloring (optional)

Directions:
1. With an electric mixer, beat butter and powdered sugar until fluffy, about 4-5 minutes.
2. Mix in the egg and vanilla extract until combined.
3. In a separate bowl, whisk together flour, baking powder, and pumpkin pie spice. Slowly mix dry ingredients in with the butter mixture until combined.
4. If using food coloring, separate the dough, and add coloring accordingly.
5. Fill the cookie press with dough and press cookies onto ungreased baking sheets.
6. Bake at 350* for 7-8 minutes, until firm and edges are just beginning to brown. Remove from oven and let stand for 2 minutes before transferring to cooling racks to cool completely.


Maple Filling
Ingredients:
4 ounces cream cheese, softened
2 tablespoons butter, softened
1/4 teaspoon maple extract
1/2 teaspoon vanilla extract
1 cup powdered sugar

Directions:
Beat cream cheese and butter until smooth. Blend in maple and vanilla extracts. Slowly beat in powdered sugar until combined.

Sandwich maple filling between 2 cookies.

Recipes adapted from diethood.
Pin It

Tuesday, October 2, 2012

Tasty Tuesday: 15 Cookie Recipes

If you're a friend of ours on Facebook, you may have seen that yesterday was National Homemade Cookies Day! We're all about the homemade cookies here. We shared some recipes throughout the day on our page, but I thought it would be fun to make a list of the cookies we've posted over the last couple years. Here are 15 recipes. All yummy, all made in our tiny kitchen, all made with the help of little ones. Try one, or try them all! You just can't go wrong with cookies.

Each post lists any tips or alterations that I suggest. Some of the help comes from things we learned the hard way. Others have come from years of use.


1. apple cookies These are a great way to use up a couple apples and a perfect recipe for fall. Or spring. Or whenever.


2. Ben & Jerry's chocolate chip cookie dough ice cream (and cookies) We made this recipe for cookie dough ice cream and needed only half. We baked the other half, of course, and promptly ate those. These are the cookies I made today in celebration of National Homemade Cookies Day.


3. chocolate chip cookies This is one of two of our favorite chocolate chip cookie recipes. Don't let the picture fool you. These cookies are nice and plump . . . when you have a certain fresh ingredient.


4. chocolate chip cookie bars Not truly a cookie in a traditional cookie sense, but they're cookie-y enough for me. And easy. And yummy.


5. double stuffed fauxreos Oreos? Yes, please! And next time, make them mint.


6. giant chocolate chip cookie What is better than a chocolate chip cookie??? A giant chocolate chip cookie! There's no need to run to a bakery to get one though. This recipe produces a thick, tasty, soft cookie that's perfect for a celebration or just because.


7. ginger cookies These are big and soft and all gingery, making them a delicious cold-weather cookie. The sugar coating and crackly surface makes them a pretty treat, too.


8. no bake cookies These cookies are not pretty by any means. But who needs pretty when you have peanut butter and chocolate??? Besides, if no one wants to try them because their looks are far from appealing, that just means more cookies for you! And more is always a good thing.


9. peanut butter cookies with Reese's pieces This is my personal peanut butter cookie recipe that I tweaked and fine-tuned until I got a cookie that is bursting with peanut butter, crispy on the outside, soft on the inside, and all-around delicious.


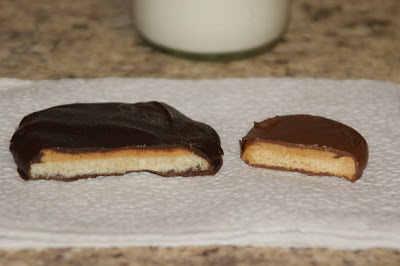
10. peanut butter patties This was our first attempt at a Girl Scouts cookie copy-cat. While it was a bit of work, the recipe has promise. Using the few alterations that are listed, you'll produce a cookie that can be sold door-to-door. Or at least taste like it should be. 


11. shortbread sandwich cookies These are soft, buttery cookies filled with your choice of yummy goodness. We tried both strawberry jam and Nutella. It's amazing how something so simple can taste so good.


12. sour cream cookies If you're looking for a light and airy cookie, these are the ones for you. These cakey cookies are quite yummy. I prefer them plain, but the add-ins are easily adaptable to your tastes.


13. spritz cookies This is the recipe we always use with our cookie press. If it ain't broke, don't fix it, right? They taste yummy and are so, so cute.


14. stained glass sugar cookies These cookies will definitely stir up some attention at a gathering. They're so pretty and impressive, but are actually quite simple to make. My little ones made them almost completely by themselves.  


15. sugar cookies If you need a sugar cookie recipe, this is it. These are so soft, so flavorful, so perfect. They hold up well to frosting, but they don't even need it. The cookies themselves really have enough flavor to be eaten alone. Just one thing - do not over-bake them. If the edges are brown, you've baked them too long. Otherwise, they're perfect.


Mmm, now I'm hungry! I am definitely a sweets girl and could eat cookies probably every day. If you try any of these recipes, let us know how they turned out. We love to hear your thoughts!

Did you celebrate National Homemade Cookies Day? If not, pretend that it's tomorrow. What cookies would you make in honor of the day?

Now, if you'll excuse me, I'm off to eat a #2 . . .

Pin It

Wednesday, March 7, 2012

Tasty Tuesday: Double-Stuffed Fauxreo Cookies

Oreo turned 100 years old! Even though the cookies have some wrinkles, break easily, and are squishy in the middle, I'd say they aged rather well. Not only are they "milk's favorite cookie," they're my favorite processed cookie as well. Whether it's the traditional cream filling (double-stuffed, of course) or the very berry, peanut butter, chocolate, or golden, I'll eat them. I've already confessed my secret about the mint ones. Oreo has lasted the test of time. It's the only cookie I'll dunk in milk - and that's saying a lot. I have never liked milk. We didn't drink it while growing up. (Not much nutritional value in it. You can get more calcium from leafy green vegetables.) In fact, I disliked milk so much that I poured water over my cereal and dunked my cookies in water as well. Weird? Yeah, pretty much. I've since gotten over my complete hatred of the white stuff enough to use a little to moisten my cereal. And of course, dunk my precious cookies.


Speaking of dunking cookies, Oreos are not just for plain white milk. Have you ever tried Oreos in chocolate milk? Hot chocolate?? Or my favorite, coffee??? Mmm, you just can't go wrong with the Oreo.

And any good food that you can buy at the store or a restaurant has a copy-cat recipe. Oreo is no exception.


Dump the first 8 ingredients into your stand mixer. If you don't have a stand mixer, buy one.

Or use a hand-held mixer.

Or use a spoon and good ol' man-power if you're trying to build muscle strength in one arm.


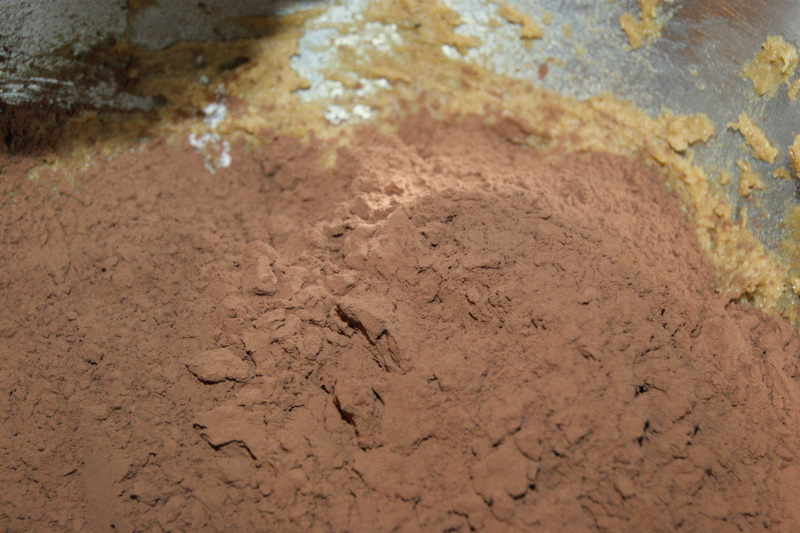
After the addition of the egg yolks, add the flour and cocoa powder. Mix well.

You'll have to use your hands to mash it into a smooth ball. That's half the fun.


Roll the dough onto a cocoa-powdered surface. This will ensure you don't end up with flour-dusted cookies. No one wants floury Oreos. No one.


Use a cookie cutter to cut your cookies. (Original, huh?) Bonus points if you have a stamp on one hand and the remains of a temporary tattoo on the other. Definitely makes the cookies taste better.

Jake said it was just like playing with play dough. I agree. The consistency was definitely like the cooked regular and the uncooked gingerbread play doughs we've made. The stiffness of this dough helps the cookie disks to keep their shape while baking. They don't spread and don't puff.


After 3 times of rolling and cutting, the dough lost its mushability. (Don't worry, that's totally a word.) It got dry and cracky. We used that last 1/3 cup for the piping. (I know we could have made more cookies out of the scraps, but I didn't feel like fighting with the dough.)

Yes, this recipe definitely makes a mess. Embrace it.


Add 1 teaspoon of hot water and mix it up. Continue adding water until it gets to the proper piping consistency.

 
I stopped with 3 1/2 teaspoons water and transferred the mixture to a pastry bag. Normally, I would use my dessert decorator, but I knew I needed more control. I learned 3 things:

1. I am not a cake decorator. (If you need one of those, call up my sis-in-law. She's amazing!)
2. My pastry bag felt neglected and was holding a grudge. My hand got really tired from trying to squish the thick substance many times.
3. It was super simple once I added another 1/2 teaspoon hot water.

Moral of the story: make sure you have the proper consistency for piping. In this case, 4 teaspoons was perfect.


Once the cookies are baked and cooled. Whip up your cream filling. Please try not to eat the whole bowl before assembling the cookies.

And try your best to keep the kids from eating it all, too.  Because, trust me, they'll try.

Fill up a pastry bag with whatever cream substance you can manage to salvage from the children. I think my pastry bag may have forgiven me by this point. It was a much easier process to swirl on the filling.

You really don't have to worry about it being pretty though. You're just going to smash another cookie on top of all your hard work.

The most important thing to remember is be generous with the cream!!!


 And there you have it - homemade fauxreo cookies!


Many of ours ended up being a little on the thick side. I realized after taking a crunchy bite that the wafers were more like 1/4 inch. I could blame it on having 3 little kids helping me roll and cut the dough, but that might not be entirely fair. Maybe I was distracted. Maybe I wasn't paying close enough attention. Maybe I just can't read a ruler.

Don't be like me. Make your wafers 1/8 inch. Please and thank you.


The cookies, though a little larger than real Oreos, are still pretty stinkin' delicious. Especially when dunked.


Little Zachy had no desire to dunk his though. He immediately treated this homemade confection just like the processed goodies - pulling apart the 2 halves, licking out the cream filling, and leaving the cookies untouched.

What kind of cookie eater are you? Do you separate the halves and enjoy just the filling? Do you eat the 2 components separately? Or are you a dunker? There's really no wrong way to eat an Oreo. Wait, hasn't that already been coined???


Happy Birthday, Oreo! Thank you for being so delicious!


Double-Stuffed Fauxreo Cookies
Chocolate Wafers
Ingredients:
6 Tbsp  butter, room temperature                                    1/2 tsp espresso powder
1/2 c  sugar                                                                      1 1/2 tsp vanilla extract
1/3 c brown sugar                                                            2 egg yolks
1 1/2 tsp salt                                                                     3/4 c + 1 Tbsp flour, sifted
3/8 tsp baking powder                                                      1 c cocoa powder, sifted
1/4 tsp baking soda                                                          few tsp hot water

Directions:
1. In a large bowl, cream together the butter, white sugar, brown sugar, salt, baking powder, baking soda, espresso powder and vanilla until thoroughly mixed. With the mixer still running, add in the egg yolks one at a time, scraping the sides of the bowl with a rubber spatula well after each addition.
2. After the yolks have all been incorporated, add the flour and cocoa. Mix on low speed until uniform and stiff. Scrape the sides of the bowl using a rubber spatula and knead a few times to form a smooth ball. Flatten into a disc. At this point, the dough may be rolled right away or wrapped in plastic wrap and refrigerated for up to a week. If you choose to refrigerate the dough, make sure you allow it to soften at room temp before rolling.
3. Preheat oven to 350F. Dust the counter with cocoa powder and roll the dough to a thickness of 1/8". When the dough has been rolled, loosen it from the counter with a spatula to prevent sticking.
4. Using a 2" (ours was 1 3/4" and close to the size of a real Oreo) round cutter, cut out as many cookies as you can. Use a spatula to place them on an ungreased baking sheet. Re-roll scraps as needed.
5. Place remaining scraps into a mixing bowl. Add 1 tsp of hot water and mix thoroughly. Continue adding more hot water, a teaspoon at a time, until you reach a piping consistency.
6. Transfer the softened dough to a piping bag fitted with a very small tip and pipe your preferred decoration onto the cut rounds.
7. Bake the cookies for about 12 minutes, or until slightly firm to the touch. Do not overcook. Once the cookies have baked, set the baking sheet on a rack and cool thoroughly. Use a spatula to pop the cookies off the sheet.


Filling
Ingredients:
1/2 c shortening                                                               2 tsp vanilla
1 3/4 c powdered sugar, sifted                                        1/4 tsp salt

Directions:
1. Cream together the shortening, powdered sugar, vanilla, and salt until very light and fluffy, scraping the sides of the bowl to incorporate fully. Transfer to a pastry bag fitted with a medium-sized round tip.
2. Flip half the cookies upside down and pipe a spiral of frosting onto the upside down cookies. Top with another cookie and press gently to seal. Transfer prepared cookies to a sealed container and refrigerate for a few hours to set the frosting and bond the wafers.


Recipe adapted from Whisk Kid.
Pin It

Wednesday, February 15, 2012

Tasty Tuesday: Shortbread Sandwich Cookies


We made these cookies for Valentine's Day, but as with so many recipes and crafts, they can easily be adapted to fit any occasion. 


 Aren't they pretty? They're fairly simple to make. Just make sure you give yourself plenty of time before starting them since there's a lot of inactive time involved.


 First thing's first - make the dough.


Once the flour is mostly combined, it's easier to use your hands to fully incorporate the dough into a ball. Wrap it in plastic wrap and place in the fridge. 


 Use your muscles to roll out the chilled dough on a floured surface.


Then cut out your shapes and place on a parchment-lined cookie sheet and pop them in the freezer for another half hour.


Use a smaller cutter (does not have to be the same shape) to cut a hole in the center of half the cookies.

Jake got excited at this part because he remembered the stained glass candy cookies we made a few months ago. We didn't fill them with candy pieces this time though.

Instead, we filled the baked and cooled cookies with strawberry jam and . . .


Nutella! Yummy!

Surprisingly, I liked the jam-filled cookies better than the Nutella ones. The hazelnut-chocolate flavor was lost in the buttery-goodness of the cookies. In order to really taste it, you have to add a lot of Nutella. And that's just fine by me too. The cookies though, are pretty delicious all on their own. I could barely keep the kids from gobbling them all up before I could assemble them. They loved eating the tiny heart cookies cut from the centers. There's just something irresistible about cute, little desserts, especially when they're really yummy! 

They make a perfect Valentine treat and are even great for weddings or anniversaries. I think it would be fun for practicing shapes with toddlers, too. You could make the cookies into various shapes and use a different shape for the cut-out in the middle. Hey, any excuse to make cookies is a legitimate reason for me!


Shortbread Sandwich Cookies  
Ingredients:    
1 c (2 sticks) unsalted butter, room temperature
3/4 c confectioners' sugar
1 tsp pure vanilla extract
2 c flour
1/2 tsp salt
jam

Directions:
1. Cream butter, sugar, and vanilla with a mixer. Beat in flour and salt until just combined. Wrap in plastic; refrigerate 30 minutes.
2. Roll out dough on a lightly floured surface to 1/8 inch thick. Cut out with a approximately 1 3/4-inch scalloped cutter, and transfer to a parchment-lined baking sheet; place in the freezer to harden for 30 minutes. Cut out heart shapes from half the cookies, then return to freezer for another 15 minutes.
3. Bake at 325° for 11-13 minutes or until just before cookies begin to brown around the edges.
4. Shortly before serving, spread scant 1 teaspoon jam on whole cookies; gently top with cut-out cookies. Refrigerate until ready to serve. Finished cookies can sit at room temperature up to 3 hours.

Pin It

Wednesday, January 25, 2012

Tasty Tuesday: Peanut Butter Cookies with Reese's Pieces

January 24 is National Peanut Butter Day! Did you know there was such a day??? Oh, the wonderful things you learn while homeschooling!  It worked out well that it fell on a Tuesday this year. Of course, that meant that we had to make something using peanut butter. (Trust me, there were no complaints here!) I looked through the archives and to see which pb recipes we've already made. There's mock Girl Scout peanut butter patties (which would be very close to the originals with a little modification), a divine peanut butter cream pie (which is so creamy and peanut buttery, and so delicious), peanut butter bars (which is our all-time favorite dessert), and even something for our outdoor friends.

What I did not find was peanut butter cookies. Sure, we have no bake cookies, that have pb in them, but no traditional peanut butter cookies, where the peanut butter itself is the star.

Don't worry, we remedied the situation.

Start with 2 kinds of sugar, 2 kinds of peanut butter, and butter (you could use 2 kinds if you really want to.)


 Beat it up. It's so much fun, you know.


Add in some eggs. This is still Jake's favorite part. Unfortunately for him, he has to share the experience with his sister. Alyssa has gotten pretty good at cracking eggs, too.


Beat it up again.

Stop to take a taste . . . or two.

Then attempt to stop the kids from eating the whole bowl full.


We had the inconvenience, I mean, joy of having Zac help us this time. He decided that he needed only a 20-minute nap. Making cookies sounded like much more fun than sleeping. 

I was reminded of 2 things:
1) Toddlers are messy. We ended up with a floury mess on the counter, on the floor, all over Alyssa. Some flour did accidentally make it into the bowl.

2) My kitchen is small. Between 3 children and all the ingredients and utensils, there was no room left to maneuver. Every year I ask Leighton for a bigger kitchen for Christmas. I have yet to find one wrapped up under our tree.


Add the dry ingredients to the bowl.

Thankfully, it was not Zac's turn to add the next ingredient. I shudder at the thought of the entire bowl being spilled everywhere.


Then comes the very best part - adding the Reese's Pieces. Just try and add them without sneaking a few tastes. I dare you.  


I admit, I shooed the kids out of the kitchen while I rolled the balls. I knew exactly what would happen if I let my 3 little angels handle the dough - more would end up in their mouths than on the cookie sheets. Zac was upset enough when I put the dough in the fridge. "Hey! Where'd tookies go?" He was ready to make a meal of the unbaked dough.


Use the tines of a fork to make a criss-cross pattern on each cookie. Unlike other cookies, peanut butter ones tend to hold their shape pretty well. In order to not have little ball cookies, you'll need to press down just a bit. 


And this is how they'll look when they're done. They look pretty good, don't they? Let me tell you, they taste even better! The edges are a little crispy with a soft, chewy center. Exactly how I like my cookies. (If you want soft edges, bake a little less.) The combination of the crunchy and creamy peanut butter is perfect since it makes a nice balance, and the nuts are not over-powering. And of course, the addition of the Reese's Pieces is a must! That extra burst of peanut butter really makes these cookies stand out. Eat them with a glass of milk, and you'll be set. You might even want to hide the rest because they'll get eaten pretty quickly!


Don't wait until next National Peanut Butter Day to try these. Make them today! 


Peanut Butter Cookies with Reese's Pieces
Ingredients:
1 c butter                                                                             2 3/4 c all-purpose flour
2 c peanut butter (I used 1 c crunchy, 1 c creamy)             1 tsp baking powder
3/4 c white sugar                                                                1/2 tsp salt
1 c packed brown sugar                                                      1 1/2 tsp baking soda 
1 tsp vanilla                                                                        1 c Reese's Pieces
2 eggs

Directions:
1. Cream together butter, peanut butter and sugars. Beat in eggs and vanilla.
2. In a separate bowl, sift together flour, baking powder, baking soda, and salt. Stir into batter. Stir in Reese's Pieces. Put batter in refrigerator for 1 hour.
3. Roll into 1 1/2 inch balls and put on cookie sheets. Flatten each ball slightly with a fork, making a criss-cross pattern. Bake in a preheated 375 degrees F oven for 8-10 minutes or until cookies begin to brown. Do not over-bake. Let cool on cookie sheets for 5 minutes before transferring to cooling racks to cool completely. Cookies will stiffen as they cool.
Pin It