Showing posts with label hammer. Show all posts

Sunday, October 6, 2013

Fundanoodle: I Can Pound!


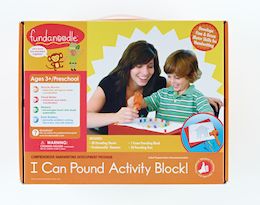
I was very excited to be chosen to review one of the products from Fundanoodle. With a name that starts with  fun, you know it's going to be enjoyable for the little ones, right? There are so many fun options that it was hard to choose one that we most wanted. Since the older kids kids often receive school products and curriculum geared specifically for them, I knew Zac (3 years) would appreciate getting his very own "school" activity. I chose the I Can Pound! activity block.


Contents include: 
  • 1 foam block (14" x 10" x 2") 
  • 1 hammer 
  • 50 pounding tees 
  • 30 activity pattern sheets


I knew that Zac would love having his own tools and place to create, just like his daddy. I knew that he would love pounding in those nails with his special hammer. I knew he would have lots of fun with his own school task. But this kit serves a purpose more than just fun. Not only does it increase creativity, it helps improve hand stability, paper stabilization, and hand-eye coordination.

The child places the block in front of him, choose one of the pictures, hold it on the block, and pounds in the nails on the dots on the paper, while working on his motor skills. Since the block is made of foam, the nails slide in easily and without making much sound. He can then flip the hammer over and use it to remove the nails again.

All 3 of our kids (7, 5, 3) enjoyed using this. Well, let me correct myself, all 4 of our kids enjoyed using this. There is a reason the kit if meant for kids ages 3+. One day after the older ones finished creating masterpieces, they left all the materials sitting out. Tyler, their 18-month-old little brother, decided it looked like so much fun, that he just had to try it out for himself. How do I know he "played" with it? I found chunks of foam around the house and little bite marks all across the block. Trust me, reserve this set for the I-know-better-than-to-put-this-in-my-mouth crowd.

If your child loves the set as much as mine do, he'd quickly pound his way through the 30 activity pages that are included in the box. Not to worry though, you can freely download extra pounding pages on their site. (My kids even enjoyed pounding on plain paper and directly on the foam to create their own designs.) I had a question about the extra pages and contacted the company. I received a response almost immediately. The employee was very friendly and helpful. We corresponded back and forth a few times, and each time, was very prompt. I am very please with their great customer service. The only negative that I have with this product is that once it is filled with holes, the foam can no longer be used. Now granted, that will take a while to fill. Thankfully, they sell replacement blocks for $9.99 so your child can continue to practice and strengthen skills.

The I Can Pound! activity set costs $29.99 and is part of their orange group (ages 3+/preschool.) Some of the other options in that group include I Can Doodle; I Can Bead, Lace, Rip and Trace; and I Can Do Math. There are many great products all the way through the second grade level. From what I know of this set and what I've seen of the others, I know that my kids would enjoy everything from this company. 


My crew mates had the opportunity to try many of the fun products from Fundanoodle. You can read those reviews on the Schoolhouse Review Crew blog. 


Pin It

Wednesday, October 19, 2011

Make It Monday: Paper Strip Pumpkins

Want to decorate your house with fall decorations that won't break the bank? Try these pumpkins that are not only super cute but frugal too!

Supplies:
cardstock                                   wood
scissors/paper cutter                string
hammer                                     tape
nail                                             pipe cleaner

 Start by cutting strips of paper out of card stock. Ours were 8.5" x .75". We used 14 strips for each pumpkin.


Using a hammer and nail, puncture a hole near each end of the strips. It was really easy using a piece of wood that already had a hole in it. (My hubby's so smart!) The kids had no trouble using a toy hammer and popping the nail right through. Of course, you could use a real hammer and punch more holes at a time, but where's the fun in that?


 Zac loved being included in the hammering. Smiles all around!


Lace the string (we used kite string) through the strips of paper and secure it with tape. To make it super easy, dab a little clear nail polish on the end to keep the string from fraying and to easily lace through. If you have a hard time, you can use the nail to feed the string through the holes.


String through the top holes. (Sorry, no picture.) Pull the string taut until the paper bows out. Tie a few knots in the top to keep it from sliding out.


Cut a piece of pipe cleaner and fold in two. Feed it through the holes to make a stem.


Fan out the strips evenly to make the pumpkin.

We made some in different sizes too. The smaller one on the right is two-toned to give it a different look. Zac even squished it a bit to change the look even more. 

Or maybe it's because toddlers are trouble and shouldn't have access to paper decorations.

To decorate a shelf, fan the strips half-way, leaving the back open.

And there you have it! Cute little pumpkins that cost a dime. To save them for next year, simply unfan and store. 


Happy Fall!


Pin It

Wednesday, September 15, 2010

Lowes: Build and Grow

For the past six weeks we've been going to Lowes every other Saturday. We're not getting supplies for any home improvements, nor am I purchasing a bunch of new tools, as nice as that would be. What we're doing is going to Lowes "Build and Grow" workshops for the kids. They go all out for the kids with aprons and little hammers for doing the projects, and they each get a certificate and patch when they finish. You have to leave the hammer there but you get to take the apron home so you can put the patches on them. All of this is free, absolutely no charge or purchase necessary.


So far the kids, Jacob and Alyssa, have made a bug box, a school bus pencil holder, and a pet leash holder (for the invisible dog we have). The projects each come with complete directions, including very good illustrations. All the parts are pre-drilled for the nails allowing for fairly easy hammering. These are easy projects for the kids and have planned out to the T making them fun for the parents as well, since you're not spending too much time interpreting what some half-hazard engineer had in mind. We all enjoy the time although Alyssa tends to have Erika or I do most of the work on hers. Jake on the other hand enjoys swinging the hammer. Thankfully no fingers have been smashed yet.


Pin It