Showing posts with label Valentine's Day. Show all posts

Thursday, June 21, 2018

White House Holidays


Our family enjoys learning together as much as possible, so we're always pleased to review unit studies. This style of learning fits perfectly with our family. While the kids do have their independent studies, I love incorporating family learning daily. Our conversations twist and turn and we end up talking about so much more than what is in the lesson. This part of our day is special to me. 

The curriculum that is currently inspiring those deeper conversations is the White House Holidays Unit Studies. While there are plenty of resources that help homeschoolers learn about holidays in depth, this one, from Silverdale Press LLC, is different. These studies focus on American presidents and the White House during each holiday.


Silverdale Press was founded by Jill and Joshua Hummer in order to provide quality resources for homeschoolers written by experts of the subjects. Along with these holiday studies, the company also offers a presidential election unit study and a persuasive writing and classical rhetoric course.

There are currently 6 individual unit for studying the White House Holidays.


Each study contains several detailed lessons that are designed for grades K-12. The lessons include history about the specific holiday along with information about various presidents. One thing I like about unit studies specifically is that we apply that topic to multiple subjects. Along with history and government, these unit cover things such as literature, poetry, writing, music, art, and baking skills. These creative activities add a hands-on learning aspect that further enriches the study.


Veteran's Day was the first unit we studied. I chose this because my kids are fascinated by battles, wars, and military tactics and this particular study is chock full of historical facts. This one comes with a set of 3 lessons for grades K-6 and a set for grades 7-12. The elementary stories are exciting and shorter and the activities are visual and hands-on, while the secondary narratives are filled with more details and the activities are focused on reading, writing, and thinking skills.

Since my kids are ages 3-12, I chose to use the elementary lessons.
  1. President Woodrow Wilson and the Story of Armistice Day
  2. President Wilson and Food Czar Hoover at War
  3. The Story of Dwight Eisenhower and How We Got Veteran's Day
The activities include a poppy pin craft, "In Flander's Field" copywork, various exercises for food conservation, and many suggestions for honoring veterans both on the holiday and throughout the year.

We have close family members who are veterans, so this was a special study for us. It made history become real as we discussed how they lived during those times and what hardships they faced. I wish I would have looked at the narratives first though instead of assuming we'd need the younger set. The secondary version is definitely much deeper and so fascinating. I read my kids more advanced literature quite often, so these lessons would have been perfect for them. They were enthralled with the small portion I did read to them. I do think the elementary activities were perfect for us though.


My middle child asked to do the Christmas study next. This one has only one set of lessons for all ages, and while there is history woven throughout, it is different than our first unit. This one focuses more on a White House theme and a special feature about how they celebrate Christmas. It has 4 lessons with a total of 24 activities.
  1. Jacqueline Kennedy, The Nutcracker Suite, and the White House Crรจche
  2. Betty Ford, Handmade Folk Art, and the Gingerbread House
  3. Barbara Bush, a Story Book Christmas, and the White House Tree
  4. Michelle Obama, Simple Gifts and Military Families, and Christmas Cards
This study could easily fill the entire month of December with Christmas-themed learning! The activities vary from creating your own nativity scene, writing a poem, making ornaments and decorations, reading speeches, listening to music, painting conifers, designing a Christmas card, baking goodies and more.

My kids especially liked that each lesson included a recipe from a First Lady, though they thought it was a little silly to be drinking hot chocolate when it was 90 degrees outside, ha.


My daughter chose our third study, Valentine's Day, of course. Don't let the title fool you though; while this unit is full of love stories, there is still much history in its pages. The letters themselves are windows to times past.
  1. The Love Letters of John and Abigail Adams
  2. The Love Letters of Ronald and Nancy Reagan
  3. The White House Wedding of John Tyler and Julia Tyler
  4. The White House Wedding of Grover Cleveland and Frances Folsom Cleveland
  5. Valentine's Day 1962 and Jacqueline Kennedy's Television Tour of the White House
The accompany activities include writing letters, creating valentines, aging paper, reading poems, baking goodies, answering questions, and more. There are suggestions for both elementary and secondary age groups.

My favorite part of this study took place while reading the love letters between John and Abigail Adams. The art of letter writing was much more pronounced and language was very different hundreds of years ago. I read "me thinks" and a giggle fest ensued. The kids thought the phrase was hilarious and repeated it often over the next few days.


These White House Holidays Unit Studies are fun resources to utilize throughout the year. The lessons are written so that you can read them to your students without any prep work. They are interesting and age-appropriate. There are many pictures throughout along with speeches, poems, letters, and links that further enhance your study.

I'm sure we'll study these holidays again along with the other 3 (Labor Day, Thanksgiving, Martin Luther King, Jr.) at the appropriate times of year and truly delve into all that these unit studies have to offer.


You can connect with on the following social media sites:

You can read more reviews of these unit studies on the Homeschool Review Crew blog.


Crew Disclaimer
Pin It

Wednesday, February 15, 2012

Tasty Tuesday: Shortbread Sandwich Cookies


We made these cookies for Valentine's Day, but as with so many recipes and crafts, they can easily be adapted to fit any occasion. 


 Aren't they pretty? They're fairly simple to make. Just make sure you give yourself plenty of time before starting them since there's a lot of inactive time involved.


 First thing's first - make the dough.


Once the flour is mostly combined, it's easier to use your hands to fully incorporate the dough into a ball. Wrap it in plastic wrap and place in the fridge. 


 Use your muscles to roll out the chilled dough on a floured surface.


Then cut out your shapes and place on a parchment-lined cookie sheet and pop them in the freezer for another half hour.


Use a smaller cutter (does not have to be the same shape) to cut a hole in the center of half the cookies.

Jake got excited at this part because he remembered the stained glass candy cookies we made a few months ago. We didn't fill them with candy pieces this time though.

Instead, we filled the baked and cooled cookies with strawberry jam and . . .


Nutella! Yummy!

Surprisingly, I liked the jam-filled cookies better than the Nutella ones. The hazelnut-chocolate flavor was lost in the buttery-goodness of the cookies. In order to really taste it, you have to add a lot of Nutella. And that's just fine by me too. The cookies though, are pretty delicious all on their own. I could barely keep the kids from gobbling them all up before I could assemble them. They loved eating the tiny heart cookies cut from the centers. There's just something irresistible about cute, little desserts, especially when they're really yummy! 

They make a perfect Valentine treat and are even great for weddings or anniversaries. I think it would be fun for practicing shapes with toddlers, too. You could make the cookies into various shapes and use a different shape for the cut-out in the middle. Hey, any excuse to make cookies is a legitimate reason for me!


Shortbread Sandwich Cookies  
Ingredients:    
1 c (2 sticks) unsalted butter, room temperature
3/4 c confectioners' sugar
1 tsp pure vanilla extract
2 c flour
1/2 tsp salt
jam

Directions:
1. Cream butter, sugar, and vanilla with a mixer. Beat in flour and salt until just combined. Wrap in plastic; refrigerate 30 minutes.
2. Roll out dough on a lightly floured surface to 1/8 inch thick. Cut out with a approximately 1 3/4-inch scalloped cutter, and transfer to a parchment-lined baking sheet; place in the freezer to harden for 30 minutes. Cut out heart shapes from half the cookies, then return to freezer for another 15 minutes.
3. Bake at 325° for 11-13 minutes or until just before cookies begin to brown around the edges.
4. Shortly before serving, spread scant 1 teaspoon jam on whole cookies; gently top with cut-out cookies. Refrigerate until ready to serve. Finished cookies can sit at room temperature up to 3 hours.

Pin It

Valentine's Day Fun

I never really was one to celebrate Valentine's Day. I didn't want someone telling me I had to show love on a certain day, that I had to buy gifts, I had to spend money. Yes, I know Christmas comes with the same idea, but that's different since we're remembering the birth of our Lord. And birthdays and anniversaries celebrate 1 or 2 people, not the entire world. Besides, I never liked chocolates (before having kids), flowers die, and spending $5 on a card seemed a bit steep.

Then I had kids. 

Now, I realize it's fun to celebrate any sort of day. I mean, I never observed Dr. Seuss' birthday or National Nothing Day or half birthdays before either. I never took the time to set aside an entire day in honor of peanut butter. But it's fun. Kids find joy in the little things of life. If making cupcake that look like George Washington make them laugh, then I want to laugh too. I want to soak in all the fun and excitement while my babies are still young. I want to truly enjoy them, life, and our homeschooling journey. 

So, yes, we celebrated Valentine's Day yesterday. 


I made the kiddos heart pancakes for breakfast. I started with regular batter and added accents with pinkish-red dyed batter. They were so pretty - until I flipped them oven to cook the other side. Then you could barely see the color. I ended up adding red to the rest of the batter and just making pink hearts. Not quite what I was going for, but they didn't seem to mind. Maybe next time I'll try coloring the majority of the batter and accenting with regular-colored batter.


For lunch, they had heart-shaped pb&j sandwiches with a fruit roll-up heart, a cup of strawberry applesauce with sprinkles, and a cup of raisins & craisins.


 Of course, we stuck to the theme for dinner as well - heart-shaped personal pizzas!


We all love homemade pizza. It's much cheaper than buying it, and you can customize it to your liking. Alyssa likes just about everything - and a lot of it.

Yum! I was going to use the rest of the dough to make a heart pizza for Leighton and me too, but I just spread it out in my stoneware pan from Pampered Chef in whatever shape it went. I hope he still knows that I love him, heart pizza or not.


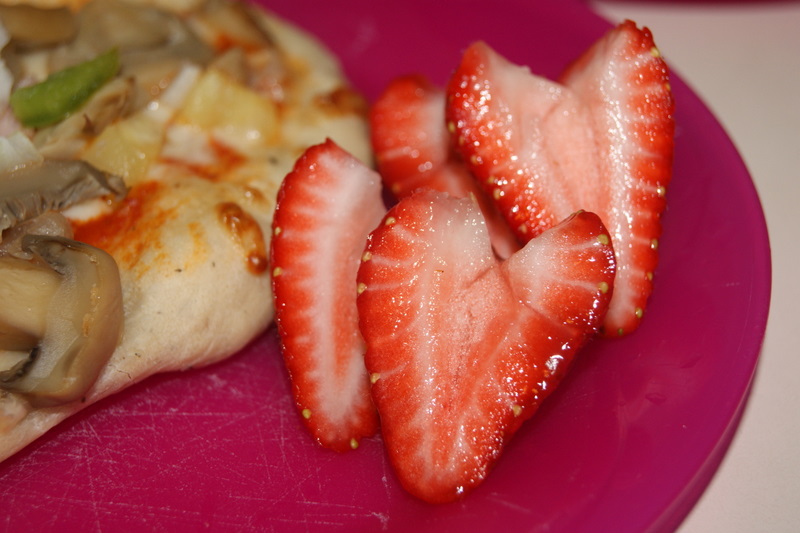
And what better to eat with your personal heart pizza than heart strawberries!


As you can see, I definitely embraced Valentine's day this year. We also completed many Valentine themed worksheets, made cards, created yarn hearts, and baked shortbread sandwich cookies. We read books and played with blocks. Leighton even brought home flowers for me the day before, though one rose found its way into a vase in Alyssa's room. We exchanged cards yesterday and he stopped at the video store to pick up a movie for the kids. 


I still don't believe I have to show my love for them just because it's Valentine's Day (because I should be doing that every day), but it is fun to participate.   


How did you spend your day?


Pin It

Tuesday, February 14, 2012

Make It Monday: Yarn Hearts

I found this craft on the Family Fun website. And it looked like fun . . . for my family. So we made them for Valentine's Day.

Start by making glue. Stir 2 tablespoons cornstarch and 1/4 cup water in a small saucepan until smooth. Heat over medium until mixture is transparent and thickens. Let cool before using.

* Tip - Don't get distracted by the kids and walk away for 3 minutes during the cooking process. Your "glue" will be like jelly. Then you'll have to add water and whisk to get it back to a thinner consistency. Trust me.


 Gather your glue, heart cookie cutters, and yarn cut into 10 inch pieces.


 Dunk a piece of yarn into the glue.


 Once it's coated thoroughly, pull the yarn back out.


 Grab it by the end, and squeeze off the excess glue using your thumb and forefinger.


 Place your yarn into the cookie cutter on parchment paper.


 Repeat until the shape of the cookie cutter is filled in a thin layer. Press the yarn down gently.


 Allow to air dry for at least 24 hours or place in a warm oven for an hour or two.


How festive!


We chose to add string to ours and hang them in the kitchen window. I love seeing the kids' crafts as I stand at my sink - especially since I spend a lot of time there! 


This craft really would work better for older children. My kiddos did fine coating the yarn, but they wanted to wipe off their hands after each one. The glue is definitely messy - but that's part of the fun! After a little while, I dunked and squeegeed the yarn, and the kids placed them in the cookie cutters. They chose the design, and I got to be part of the process. Teamwork at its finest!

This could also be adapted for any occasion - eggs for Easter, bulb ornaments for Christmas, flowers for spring, ect. We're even thinking about red, white, and blue stars for the Fourth of July! Have fun experimenting!
Pin It

Wednesday, February 8, 2012

Tasty Tuesday: Brownie Pops

Valentine's Day is fast approaching. There are so many Valentinesy recipes I'd love to make, but there just isn't enough time to make them all - nor enough people to help us eat them all! Michaels had a fantastic coupon ($5 off $5 purchase!) this past weekend and I was able to pick up a few things for free! I grabbed a bag of red candy melts, knowing they would come in handy this time of year. Also, I've had a bag of sucker sticks lurking in the cupboard for quite a while, begging to be put to good use. Throw in a batch of brownies and some sprinkles, and you got yourself a yummy Valentine - or anytime - treat. 


Start by making a batch of brownies. Line your pan with aluminum foil to make it easy to remove the brownies after they're baked.


 Once the brownies are cool, cut off the yummy crusty edges.


And of course, eat them! I absolutely love the end pieces of brownies. The chewiness of the edges, the mushiness of the middle, the richness of the chocolate . . . mmmm! You know, we bake a lot of different desserts and such around here, but the simple brownie will always remain at the top of my favorites list.


Once you've finished indulging in the discarded edges, put the rest of the brownies in a bowl and mash them into crumbs.


 You can tell how much Alyssa loved this part.


 Of course, little Zachy had to join in the fun.


 But I'm pretty sure it was just a ploy to eat more brownies.


We used our cookie scoop to measure approximately 2 tablespoons of brownie crumbs and rolled it into balls. 

If your brownies won't hold together on their own, you can add in 1/4-1/2 cup frosting to help them adhere. Ours were pretty fudgy and mushed together fine by themselves.


Push a sucker stick, or even a popsicle stick, deep into the brownie balls. Place the balls in the freezer for at least 30 minutes or the refrigerator for 2 hours to harden. 


 Dip a ball into melted chocolate, making sure to coat it all.


Allow the excess chocolate to drip off. Tapping the stick gently on the side of the bowl helps to speed the process.


 Hurry to add your sprinkles before the chocolate hardens.


 Repeat.


And repeat.


If your balls are out of the freezer too long before you get a chance to coat them, they will fall off the stick in a mushy mass into the melted chocolate. Fish it out, plop the stick back in, and pop it into the freezer to harden up again.

Then, do the respectable thing and eat it. You certainly wouldn't want to serve such a hideous pop to company. It's best to just discard the evidence before anyone can see it.


I had been planning to jam the sticks into styrofoam or floral foam to keep them upright while the chocolate hardened, but I couldn't find any in the house. My sweet hubby offered to make me a holder for them and returned a few minutes later with this wooden stand. I sure do love that man.


Now who wouldn't want to receive one of these lovely brownie pops for Valentine's Day??? They're small and cute and very festive! And best of all . . . 


 . . . there's a fudgy brownie inside!!!


Make a batch today and surprise the ones you love!


Linked to Watcha Making Wednesdays and Show and Share Saturday Link Up
Pin It

Tuesday, January 31, 2012

Make It Monday: Coffee Filter Hearts

It was about time to update our kitchen window with colorful creations. Down came the Christmas-y winter decals and up went our new Valentine hearts. The process was both easy and fun! Two ingredients for a winning craft in our house. 

The inspiration came from our coffee filter butterflies. The kids were a little disappointed that there was no water spraying this time though, but mommy was happy that it didn't make a mess. Maybe next week I'll pick a super messy project to make up for it.


 All you need are a pair of scissors, coffee filters, dot markers, and a couple of cute helpers.


Fold the coffee filter in half and cut out a heart. 


 Fold up the heart any which way you want and dab away with the markers!


Make a pattern, color the entire heart 1 color, or dot random colors everywhere. No matter how you decorate it, you can't go wrong!


If the heart is folded a few times, make sure to turn it over to ensure the color bled all the way through.


It's so much fun, you'll want to make lots and lots of hearts!


But the real fun is in opening the hearts up and seeing the designs you made. We found butterflies, more hearts, letters and faces. Each time, we ooh-ed and aah-ed and the beautiful formations. I admit, I had just as much fun decorating the hearts as the kids did! And they look especially pretty on our window when the sun shines through, not that you can tell by looking at the picture I took after the sun started to go down and the sky became overcast. Oh well, I guess you'll just have to make them and experience their beauty yourself!

And even once the markers are all put away, you can still have fun with the filter scraps . . . 


It's the craft that keeps on giving.

Pin It