Showing posts with label eggs. Show all posts

Wednesday, May 2, 2012

Tasty Tuesday: Breakfast Burritos

¡Bienvenidos! Cinco De Mayo is quickly approaching. The fact that we're not Mexican, nor do we actually celebrate the holiday, isn't going to stop us from eating Mexican inspired foods! In fact, I even made chicken quesidillas for dinner.

Ok, so it was mostly because I had leftover chicken from the rotisserie we made the other day, but whatever. 

I like to make these burritos for Leighton for the mornings. He starts work at 6:00 am and doesn't always have  time to eat a sit-down breakfast before rushing out the door. He does, however, have time to grab something out of the freezer and pop it in the microwave. (I also make freezer breakfast sandwiches and waffles and like to keep muffins and quick breads on hand for variety, too.) The burritos are quick, easy, and filling. But more importantly, they're tasty!

I have fond memories of these burritos from when I was young.  I can remember watching my mom and aunt assemble these while we were visiting family in Texas. Later, my mom, dad, and I sat around the kitchen table with big bowls of fixings and made them again as a family. Now, I can build memories with my own little ones. What better way is there to bring a family together than food?


Cook the sausage until it's no longer pink.


Sauté the onions and peppers until soft.

I used a combo of green and chocolate peppers. And unfortunately, no, it does not taste like chocolate. Boo.


Scramble your eggs. Add salt and pepper as desired.


Dump everything into a HUGE bowl.


See that coffee cup? See the bowl? There's your size reference. Yes, I make a huge batch at a time. I don't want to be making these things up every week.


Give it all a good mixing.


Realize you forgot the cheese - oh, the horror! - add it and stir again.

Or you could just add it before mixing the first time. But where's the fun in that?


Place a healthy portion (healthy being a relative term) on a tortilla.


 Pull the ends in and roll from one side to the other.


Yum! You can either eat it now or -- Wait, what am I saying? Definitely eat one now.


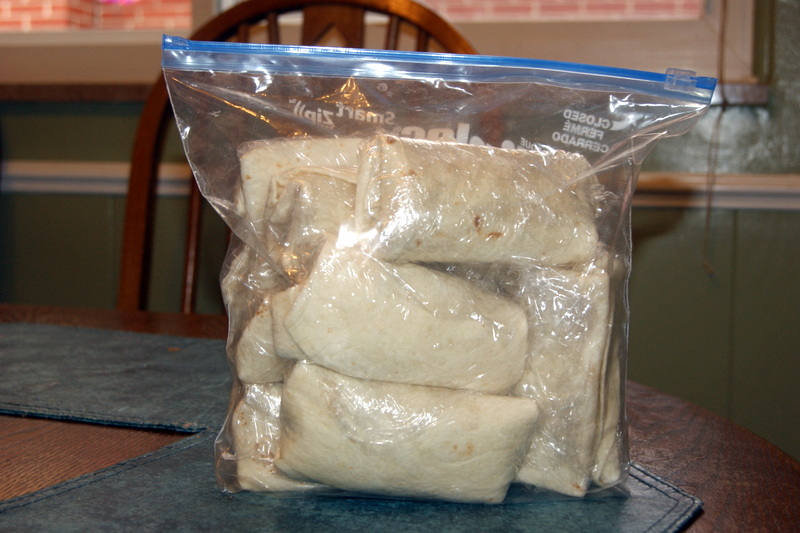
The rest you can wrap and save for later.


I keep these in a freezer bag . . . in the freezer. Just make sure you zip it closed so they stay fresher longer.

Grab a burrito or two when you're rushed in the morning or anytime you want a hot, yummy meal. Pop it in the microwave for a minute or so, depending on how big your burritos are. This time, I used some taco-sized tortillas and mostly fajita-sized tortillas. (And yes, I'm still calling these "burritos.") I got 40 burritos altogether. Even my kids love these, so a batch doesn't last all that long.

As with any recipe, feel free to change the ingredients/amounts to your liking. Add some jalepeños for heat or potatoes for roughage or change up the flavors of cheese. Make the recipe your own. Also, the amounts can easily be decreased if you don't want enough to feed an army.

Do you eat breakfast burritos? What ingredients do you like in it?


Breakfast Burritos
Ingredients:
2 lbs rolled pork sausage
2 onions, chopped
2 green peppers, chopped
3 dozen eggs
3 cups salsa
5 cups shredded cheese (I used colby-jack.)
tortillas

Directions:
1.Cook the sausage in a skillet over medium-high heat until no longer pink. Pour off grease and dump sausage into huge bowl.
2. Cook the onions and peppers in the same skillet (already coated with sausage grease) over medium heat for 5 minutes or until tender. Dump into huge bowl.
3. Crack eggs in large bowl and whisk (with milk, if desired.) Pour into skillet and cook over medium heat, stirring occasionally, until desired doneness. Dump into huge bowl.
4. Add salsa and cheese to bowl and combine thoroughly.
5. Warm tortillas in microwave.
6. Place desired amount of mixture onto each tortilla and wrap, bringing in each side and rolling closed. Wrap in plastic wrap and place in a freezer-safe bag or container.
* To Heat: place a burrito in microwave for 1-1 1/2 minutes, depending on size of tortilla and amount of filling 
Pin It

Friday, April 13, 2012

Easter 2012

What a weekend! (I should say "What a week!" I have been trying to get the post done for days!) Holidays are so much fun, but also very busy. It always take me a whole day to reclaim the house after rushing around like we did for days. We finally dyed eggs on Saturday night right before bed. Last year, we used the Dudley Egg Spinner. This year, we chose the old-fashioned route of placing the eggs into the vinegar-water-dye tablet mixture. As we waited for the tablets to dissolve, Jake asked, "Why does is smell like cleaner?" Can you tell what I use to clean our house???

I was pleasantly surprised that we had no mishaps. Er, I was pleasantly surprised that the kids had no mishaps. Should I mention how I may have spilled some vinegar while I was filling the cups? No? Good. I will say it was a good thing we had a tablecloth.  

The had so much fun dyeing the eggs. They would follow the same pattern with each egg:
1. Drop the egg into the cup
2. Wait approximately 2.83 seconds
3. Pull it out to inspect the boldness of the color
4. Repeat steps 1-3 as needed.

Needless to say, it took quite a while to decorate 2 dozen or so eggs. We lost a couple along the way that the kids dropped too quickly into the cup and one that daddy dropped onto the table and broke. We made up for it though by dyeing a few of the brown eggs that I accidentally boiled days before. We impressed the kids by using a white crayon to write on the eggs and having their names magically appear after being dyed. They also had fun playing pictionary with daddy to bide the time while the eggs were sitting in the cups. 

This year, we filled the eggs with LEGOs. (Way better than candy!) Each child had his own set in his own colored eggs. The blue and yellow eggs for Zac were the easiest to find. Alyssa's pink eggs were hidden with a medium difficulty. Jake's green and orange eggs were the hardest to find. Knowing which color to look for made the event run smoothly. It also ensured that each child had the exact same number of eggs. Plus, it was just way more fun!


I think I'm just as excited every year about the baskets as the kids are! They get so many cool things! They each got a new pair of shoes/boots, coloring/activity books, reading books, crafts, bubbles, and toys. And just like last year, the bottoms of the baskets were filled with shirts, pajamas, and a spring jacket. It's just like Christmas! Tyler even got his very first Easter basket. I'm happy to say that he was absolutely thrilled to find all those diapers!   


Why is it so difficult to get kids to cooperate for pictures? Zac will tell me 47 times in a day, "Mommy, take picture me!" But when I'm trying to get a nice picture, it"s a totally different story. This is probably the best picture we got of all 3 kids before church.

* Side Note: Aren't they still adorable in their Easter outfits???


We tried again after church before going to my parents' house. Here we have 2 boys not cooperating. Getting better though.


And we tried again after we got to my parents'. What can I say? We're gluttons for punishment. Zac still was refusing to smile for the camera. As soon as we pulled it out, he hid his face in my shoulder. Bribing him with candy didn't even produce a smile! {gasp}

We finally got this picture of the family. While it might not be magazine-worthy, I'm just happy that no one is in tears and everyone is looking in the general direction of the camera.

And to think it took only 49 tries to get this one picture.


Of course, we enjoyed our day spent with family. We had entirely too much food - ham, fresh and smoked Polish sausage, deviled eggs, cheesy potatoes, sweet potato casserole, rolls, strawberry cheesecake, cupcakes, tres leches cake - ate entirely too much, and probably had entirely too much fun. I hope you had a lovely Resurrection Day and thanked the Lord for what He did for you.   


Pin It

Tuesday, April 3, 2012

Make It Monday: Marshmallow Easter Eggs

This is a very, very easy project for Easter. But don't let its simplicity fool you. It actually sneaks a little bit of learning into craft time!

All you need is a paper cut-out of an egg and colored marshmallows.


Just hand your kids the 2 supplies and let their imaginations do the rest.


They might make stripes, polka-dots, trees, flowers or a smiley face complete with eyebrows and mustache!

Or . . .


They might just plop all the marshmallows onto the egg.  Hey, whatever works!

I took advantage of this time to work on colors with my 2 year old. He's known all his colors for many months, but he still likes going over them. I would say "find a green marshmallow" or "can you put a pink one on the egg?" It was good review.


You can even practice patterns - easy ones for the younger kids and harder ones for the older.

But the best part???


Cleaning up!

Zac ate all of his marshmallows long before the other 2 kids were finished creating and recreating their Easter eggs. He kept reaching across the table to grab some out of Alyssa's bowl.


Little Stinker!


Grab some paper eggs and marshmallows and have fun decorating your own Easter eggs! 


Just make sure you have plenty of marshmallows to go around!


Pin It

Wednesday, April 20, 2011

Tasty Tuesday: Jello Eggs

When we colored Easter eggs on Monday, I mentioned how we were given a couple gifts. Our second one was a JELL-O egg mold. How cool! I had never seen one of these before. Apparently, I live a sheltered life. 

On to the eggs!

Blast the mold with non-stick cooking spray. Snap the mold closed.

Add 1 (3oz) package of jello to 3/4 cup boiling water. Spill some of the powder because obviously you have too much.

Stir until completely dissolved.

Repeat.

Pour the liquid into the spouts at the top of the mold.

If your mold is not completely closed, the liquid will pour out the side.

Pour the liquid jello back into the measuring cup.

Repeat steps 1 and 5, paying close attention to snapping the mold completely closed. Place in the refrigerator to set.

We tried 2 solid eggs of each color and 2 mixed eggs. Apparently, the mold popped opened again before adding the red.

Jiggly, jello-y eggs
I let the jello set for an hour and a half before adding the second color to the 2 mixed eggs. The extra red had hardened on the kitchen counter. I popped it in the microwave before pouring it into the two remaining molds. The one spilled right out the back. The other worked just fine. That is if you only wanted half an egg. The halves did not fuse together like I had hoped. That's ok. Half an egg was perfect for Zachary.

He put in his thumb and pulled out . . . an Easter egg.

This is his first experience with jello. Just a guess, but lime not might be his favorite.

These make great sensory objects for the kids. They had fun holding, squishing, wiggling and eating them. And of course, they thought it was hilarious that there was jello all over the plate. How does that saying go, "One man's spilled jello is another man's treasure"?
Pin It

Tuesday, April 19, 2011

Make It Monday: Coloring Easter Eggs

A friend of mine from church (Hi, Mrs. Lipka!) graciously gave us a couple of early Easter presents. One of them was a Dudley's Spin an Egg Spinner. This little contraption is perfect for young egg colorers. No messy dye. No spilled cups. Just pure egg coloring fun.

It is so simple to use. Put in a drop or two of food coloring and an egg, close the lid, and spin away! We used a blow dryer to speed up the drying process so we could add other colors. (When we didn't let them dry, the colors mixed together. All our first ones turned green!)


Everyone loved using the spinner, especially Zac who thought it was his. He cried and tried grabbing it away from anyone who even looked like they were going to push the button. It took 40 minutes to color 8 eggs because he had so much fun spinning.


Aren't they pretty? The kids had a blast, and the only mess was the tips of my fingers from pulling the eggs out.

I have to say, Dudley was a genius.
Pin It