Showing posts with label spring. Show all posts

Sunday, June 9, 2013

Pantry Surprise 6/8/13


I was was putting things away in the closet . . .


. . . and found a Slinky in Leighton's shoe.


Now that's what I call putting a spring in your step!


Want to catch up on Pantry Surprises? You can find the entire list here. (Ha, I just realized that the last surprise I shared was something very similar. That baby . . .)

Pin It

Monday, April 29, 2013

Make it Monday: $2 Birdhouses

Erika asked me to make birdhouses with the kids last year, yes, last year. I, being a Maker and woodworker, loved the idea. Yet I still managed to forget about the request for a little while. Then one day it was brought up again and I hopped to it. I immediately turned to my favorite DIY site, instructables.com, for ideas. One of the first returns on my search was the $2 Birdhouse posted by CheapChuck. A simple birdhouse that didn't cost much, but still did what we wanted. I knew instantly what birdhouse we were making.

The basis for this birdhouse, or our building material is simple. You need one, yes one, five to six foot long dog-eared cedar fence picket. Small disclaimer: in the instructable the house is referred to as a $2 house but my local Home Depot charges $2.25 for the picket, but I still think it is a cheap build. They do sell a $1.18 pine picket, but that one is treated. Not very bird friendly. Plus cedar is a good outdoor, low maintenance building material. Anything else you need you can probably find in your workroom. I did.

So last year I went and got three, we have three kids old enough to make houses, cedar pickets. I spent a few minutes one evening cutting out all the pieces. You need two peaked, end wall panels, two side wall panels and two roof panels. The floor panel you wait to cut out until you put the rest together so that you can measure what you need.

I also trimmed one of the roof panels for each house along its width equal to the thickness of the board. This allows for a symmetrical look to the finished roof.
Cutting it all out really wasn't difficult. Getting around to putting the houses together, now that's a different story. We didn't get around to making them last year before the birds nested. So I intended to get them together for this years nesting. Still not entirely sure if I managed that, but they're together none the less.

To construct these I used exterior wood glue, 18 gauge brad nailer, hammer, drill with 3/32", 1/4" and 1 1/4" bits. I have to admit, I had to buy exterior wood glue since all I generally use is interior, but that is not much cost added to the project. When it came time I covered the kitchen table with newspaper, and ran my air hose in from the porch. I called the kids in and we began assembling birdhouses.
We started by assembling the four walls. A peaked wall goes at either end with the rectangular walls between them. Apply glue to the edge of the rectangle wall, align with the peaked piece, and give it a couple of nails from the gun. If you are going classic with a hammer and nails I recommend pre-drilling the holes so as not to split any wood.

There was no problem getting the kids to help with the gluing process, they're used to that. But the nail gun brought fear to their eyes. It's new to them and loud, none of them like how loud my tools are. I do appreciate their fear of the tools though. It will help them learn to respect how dangerous they can be and the proper way of using them.
From the walls you move to the roof, putting on the piece you trimmed first. Apply your glue on one side of your peaked walls. Align the edge of the roof piece with the other peak surface to create an even surface for the other, wider piece to sit on. Nail again.
And this is when the battery in the camera died. Not too many more pictures were taken. I apologize for that. I plan to make another house with a clear rear wall. At that time I'll take more pictures of the process. We're hoping that we can mount that house someplace close to a window so we can observe what is happening inside.

Once that side of the roof is secured you can apply glue for the other side. Make sure you put plenty along the top ridge so that it will create somewhat of a seal from rain when it dries. Place the piece and nail again. Once the roof is in place you can work on your entrance. I drilled a 1 1/4" hole center on the front in line with the bottom of the roof. Make sure to sand both sides of the entrance so has to help avoid a splintered bird. Before you drill that hole though, mark the spot for a perch two inches below the center of the entrance. I used a 1/4" drill and inserted a sanded 1/4" dowel roughly three inches long.

Now for the bottom. This will also be your entrance to clean the house out once the occupants leave. Yes, just like human renters, these users do not clean up after themselves. Cut you base leaving yourself about an 1/8" around the perimeter, 1/4" smaller than what the house measures. On one end cut or sand a 45 degree angle off the bottom so the panel can hinge out for cleaning.
Pre-drill holes for a standard nail, I used a 6d 2" nail on either side as my hinge. A 3/32" bit made a hole just the right size so I could simply push the nail in with almost no hammer use. On the other end of the base I drilled a hole the size of which I do not remember and insert a standard coarse thread drywall screw to hold the floor up. When it comes time to clean the home I will remove this screw and swing the bottom out and allow the contents to empty.
Yes the kids did help me with this project in between trips to the living room to slide on a big cardboard box they had been playing with. I still get a little nervous having them run power tools so I do a lot of that for them, but I try to get their hands on the tool while I am doing it.
What they had fun with was painting them. I was not at home for this process, but it was something they can do mostly on their own. So with no one hindering what they had to do, they went wild painting them however they felt.
Well, our kids had fun making our "$2" birdhouses, and if I manage to get them up in time some birds will enjoy them. How about you, want to give your kids, or yourself, a good time and a couple of birds someplace cozy to stay for a while?

Pin It

Tuesday, April 17, 2012

Make It Monday: Popcorn Cherry Blossoms

One of the things I love about spring is seeing the trees start to bud. That new life and splash of green and is refreshing after the gloom of winter. My favorites though are the flowering trees. The pinks, the purples, the whites - all so pretty. We used to have a beautiful flowering tree in the front of our house. Pretty, that is, as long as the flowers were still on the trees. Once they started falling - and got glued to the exterior of our van - it wasn't so pretty anymore.  Even after we'd clean off the dead flowers, there would still be gunky residue left on the van. Yuck. 


Leighton cut down the tree and filled the space with concrete to expand our driveway. While I don't miss the dried flower gunk or having to walk through the mud to get from the van into the house, I do miss the pretty flowers.

Not to worry, we now have our very own cherry blossoms . . . inside the house.


To make the tree trunks, we traced each child's hand and arm.


Then, they colored them.


You'll need popcorn and pink/red/purple JELL-O for the blossoms.


Pour both the popcorn and the JELL-O powder into a bag.

Make sure the bag has no holes. One way to check is to pour them in and shake. If the powder spills out all over the table, there is a hole. 

Ask me how I know.


Once you pour the popcorn and powder into a new bag - one with no holes - shake, shake, shake it up!


Squeeze dots of glue all around the tree and place popcorn in each one.

Our blossoms were more purple-y than the pink I had originally envisioned. That's what I get for letting Jake, Mr. I-love-everything-cherry, choose the JELL-O. The color did change to pink once they touched the glue though. Also, I sprayed them with hair spray to ensure that the powder stuck and to turn them pinker.

I could have spritzed them with water to bring out the pink, but I remembered what would happen!


Of course, there was plenty of popcorn eating as well. And messy, sticky fingers. And dirty faces. And a powdery table. All the very best things about crafting.

Jake liked the popcorn so much that he asked if we could make it for Tasty Tuesday. It's no wonder he liked it; it tasted just like the fruit-flavored pancake syrup we made.


Aren't they pretty! There's really no wrong way to place the blossoms. The ones off the tree look like flowers that the wind blew away. (Good thing there's no van next to it!)

We got 3 beautiful cherry blossom trees (without the hassle of the clean-up!) and a tasty snack to boot? Sounds like a great springtime craft to me!


Hope you have fun making your own flowering trees!


Pin It

Tuesday, April 3, 2012

Make It Monday: Marshmallow Easter Eggs

This is a very, very easy project for Easter. But don't let its simplicity fool you. It actually sneaks a little bit of learning into craft time!

All you need is a paper cut-out of an egg and colored marshmallows.


Just hand your kids the 2 supplies and let their imaginations do the rest.


They might make stripes, polka-dots, trees, flowers or a smiley face complete with eyebrows and mustache!

Or . . .


They might just plop all the marshmallows onto the egg.  Hey, whatever works!

I took advantage of this time to work on colors with my 2 year old. He's known all his colors for many months, but he still likes going over them. I would say "find a green marshmallow" or "can you put a pink one on the egg?" It was good review.


You can even practice patterns - easy ones for the younger kids and harder ones for the older.

But the best part???


Cleaning up!

Zac ate all of his marshmallows long before the other 2 kids were finished creating and recreating their Easter eggs. He kept reaching across the table to grab some out of Alyssa's bowl.


Little Stinker!


Grab some paper eggs and marshmallows and have fun decorating your own Easter eggs! 


Just make sure you have plenty of marshmallows to go around!


Pin It

Tuesday, March 13, 2012

Welcome, Spring!

Spring has sprung! Or at least it's in the process of springing. Today was gorgeous. The sun was shining and the temperature was nearly 70. The kids played outside all day. It gave me a chance to get caught up on housework that has been all but ignored this past week. To say I've been ill is an understatement. I didn't even venture out of bed all day Thursday. Friday was a little better. Saturday, I felt well enough to attend an all-day youth conference. (Read: Saturday, I was too stubborn to miss out on an all-day youth conference.) Sunday, I paid for my stubbornness. And I was still completely wiped out Monday. I won't list all the ailments I had, but trust me, for me to see the mess all around and not even attempt to clean it, meant I was sick. Really sick. The kids have been fantastic. Jake helped a lot with the other two, and all 3 helped get anything I needed. I'm sure allowing them to watch an excess of television and eating poptarts (which are reserved for Sunday morning breakfast) for lunch helped them all behave better. It has been an off-week for sure. 

But when I woke up this morning . . . I felt human again! I have been non-stop all day. What a feeling! Since it was so nice outside, I was able to open the windows, disinfect the house, and chase all those germs away. (Thankfully, they didn't seem to bother anyone else before they left.) In between cleaning, laundering, washing, organizing, sorting, vacuuming, and cooking, I was able to spend some time outside with my loves. 


Zac spent most of the day in the swing. If I wasn't pushing him, one of the other two were. Even so, he was content to just sit there a few minutes before calling someone over to give him another push. 


I showed Jake and Alyssa how our tulips, daffodils, and strawberries are starting to grow. Jake made sure to pick me the first flower of the season. Then, they continued to pick nearly the rest of the bunch.


They loved being able to eat lunch outside again. They all just had to sit on the same side of the table. I guess they really do love each other.


 These 2 spent most of the day digging in the mud, looking for worms.


After dinner, we all headed back outside to sit by the fire. Zac found his way back into the swing and conned Daddy into pushing him. We brought out the fixings for s'mores once it got dark.


Little Guy was not quite sure what to think of the gooey messy that was placed in his hands. He kept licking his fingers, trying to get rid of the stickiness. He took a few bites of the s'more, handed it to Jake, and settled in with the bag of raw marshmallows.


I feel good, the house is clean, we had fun together. It was a wonderful day. Welcome, Spring. Glad to have you back.


Pin It

Wednesday, May 25, 2011

Make It Monday: Coffee Filter Butterflies

Coffee filters are cheap, easily accessible, and versatile. They are also so fun!

Supplies:
coffee filters                                            googly eyes 
markers                                                  pipe cleaners
clothes pins                                            glue  
spray bottle of water                               newspaper
pom-poms

Place all the supplies on the table and take a picture.

Color, color, color the coffee filters. The more color the better.

Use the spray bottle to spritz the filter with water.

Take time to spray yourself.

. . . or your sister.

The water makes the colors bleed and run on the filter.  The spray bottle was definitely their favorite part. Alyssa would scribble a single mark on a coffee filter and ask to spray it. Make sure you have lots of newspaper handy. I covered the table in a few layers and added more periodically throughout the activity. I also had to refill the spray bottle.  If you douse the filter with too much water, the color will run off. It did not matter how many times I tried to explain this to them though. Did I mention they liked the spraying part?

Once the filters dry, which will take a looong time unless you remove them from their personal pool of water, begin assembling the butterflies.

Pinch the filter in the middle and clip it with the clothes pin. Glue on  pop-poms, eyes, and antennae.

Fly your butterfly around.

Or just show it off.
While you are assembling the butterflies, do not allow the baby at the table. If you do, he might knock over a cup of water, spilling it all over the coffee filters again. Since you will have already put the newspapers into the recycle bin, you will set the wet filters on the counter so you can wipe up the table and floor. Then, you will notice the lovely Easter egg decorations that now adorn your kitchen counter because the marker was reactivated.


Then, you will call your mom and thank her for introducing you to Soft Scrub because that is the only thing that removes marks from your kitchen counter.

At least, I imagine that is what would happen if the baby is at the table. I can't say for certain.
Pin It

Monday, April 11, 2011

Make It Monday: Thunderstorms

April showers bring may flowers. We made the flowers last week and the rain this week. (Ok, so maybe we're a little dyslexic.)

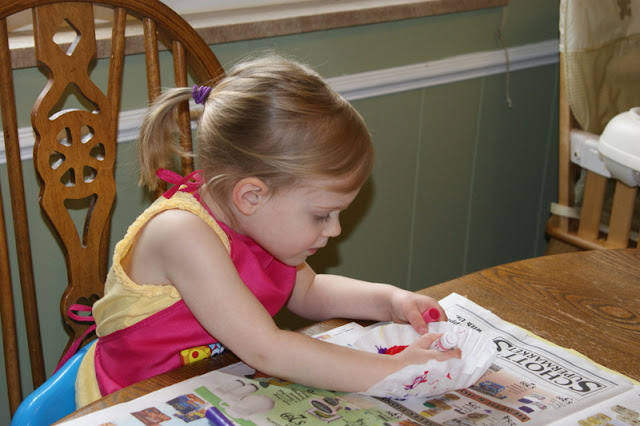
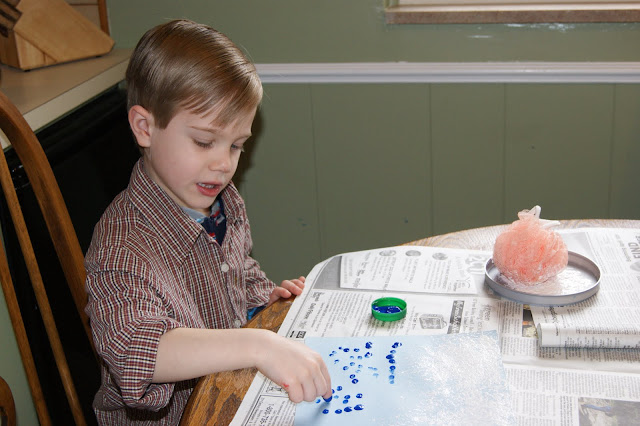
We used a shower pouf to make clouds.

Finger prints make perfect little rain drops.

Jake insisted they add yellow lightening bolts. What a storm!
Painting with the pouf was so much fun! It was addicting dab-dab-dabbing it on the paper. And of course, finger painting is always a good time. Once they were done painting their storms, they moved on to the newspaper. Alyssa attacked the paper with the pouf and made swirls with her finger. Jake took the experimental route and spent time mixing the paint to make new colors. 

We started with the paint in juice caps and a coffee can top. (It's a good way to re-use things you already have. Plus, you don't have to spend time washing them afterward. Just toss them in the garbage and save on water too!)  Eventually, we squirted the paint right on the newspaper for them to spread around.


You really need to try painting with a pouf! They clean well and are tons of fun. Use your imagination and make sure to come back and share your creations with us!
Pin It

Wednesday, April 6, 2011

Make It Monday: Egg Carton Flowers

It's been rainy and dark and gloomy. Hello, April. We made these flowers to bring some color and cheeriness into the house.

And because it was Monday.

Supplies per Child:
3 cardboard egg cups                                                             Toothpick
3 pieces (4" x 1 ½") of green craft foam                                 Scissors
3 green chenille stems (or brown, if that's all you have!)        Paint/brushes
6 squares (3" x 3") of  colored tissue paper


Directions:
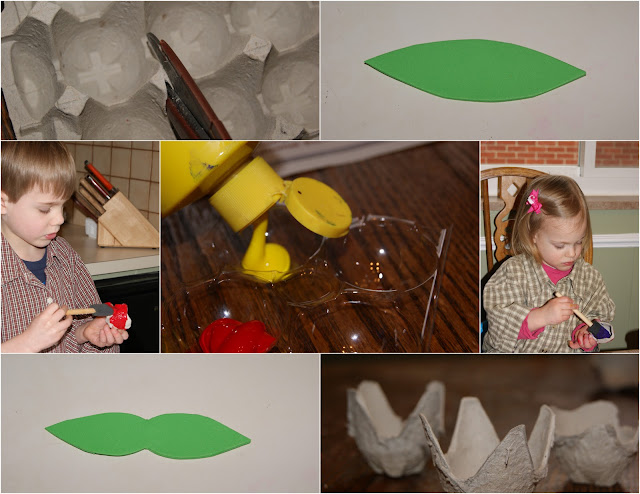
1. Using an empty egg carton, cut out three egg cups and trim them down.
2. Paint the egg cups. Set aside to dry.
3. Cut the green craft foam into footballish shapes.
4. Use scissors to give your leaves more shape by trimming them into an hour glass type shape.
5. Use a toothpick to poke a hole in the center of each leaf.
6. Poke a chenille stem into the hole in the center of the leaf. 
7. When egg cups are dry, use toothpick to poke a hole in the bottom of each egg cup.
8.  Insert the top of the chenille stem into the hole in the egg cup.
9. Insert the top of the chenille stem into the center of the two tissue paper squares. Run the egg cup up to the tissue paper. The tissue paper will tuck inside the egg cup. Bend the end of the chenille into the tissue paper to hold everything in place.


Jacob and Alyssa did everything themselves, except the cutting. Let me tell you, I didn't even want to do the cutting of the leaves. I almost waited until Leighton came home to do it. Yes, I admit it. Freehand cutting is not my thing. I cut. I re-cut. I shaped. It was a long process. By the sixth set of leaves though, I cut, cut, cut, cut and voilĂ ! Leaves!

The kids liked painted with the foam brushes. They helped fill in the texture of the carton. Jacob, of course, painted all 3 of his flowers red. Everything always red. He also painted the insides of them, even though I  tried to convince him that they wouldn't be visible. It made for some messy fingers. Thankful for washable paint! We used the top of the egg carton to hold the paint. Such an economical craft!

Jacob insisted that we sprayed the flowers so they were more realistic and smelly. Zachy especially liked sniffing them. 

See? All this rain has been good for something!
Pin It

Thursday, March 18, 2010

Warm weather brings family walks.

The weather  in Michigan has gone warm. Today we peaked into the 70's, but wait Monday is suspected to bring us back to the 30's. I've even heard rumors of snow. Snow or not I'm sure Tuesday will warm us right back up to spring. It is this time of year that the rakes and yard waste bags get pulled out and the outside work begins with high hopes of summer projects and many days enjoying the great outdoors. Along with the warm weather work comes our family walks and bike rides. Last year we would pack Jake and Alyssa into the bike trailer and go for a ride. That is until Jake wanted to start riding his bike. We tried to ride with him one time.

Have you ever watched an experienced bicyclist stand still with there feet still on the pedals without rolling? It looks really cool and makes you want to try it. If you've ever tried it you find yourself repeatedly using lightning fast reflexes to keep from cracking anything important on the concrete. Well, I began to wish I was fully capable of this feat that marvelous day, although I did get much better at it that day my feet touched the ground a lot. Jake had really just begun to ride a bicycle last year so it was no surprise that he moved slowly and sporadically down the sidewalk. Needless to say we took up walking with Alyssa in the stroller and Jake remaining on his bike.

The walks were nice and leisurely through the neighborhood allowing us time to look around at our surroundings.  Today we went for a walk and nearly had to run to keep up with the speed demon on the pedals ahead of us. There was no opportunity to observe the landscaping to get ideas for our own, no observing who had started yard work or not, not even a chance to really see how many people were out. We had to focus on where Jake was. One minute he's flying down the sidewalk with the ease of a veteran with his parents practically running with the stroller to keep up. Then, out of nowhere, he's braking hard and Alyssa's almost able to tap him on the back since mommy can't stop the momentum of the stroller fast enough. Every once in a while in his hurry he would get the bicycle up on the front wheel and one of the trainers. This would either slow him down for a second or bring him to the ground giving us a slight reprieve from the running.

Despite the stop and go and Jakes frequent water breaks, riding a bike is hard work you know, the walk/run was nice. It is time for the  family to spend together outside in the sun and fresh air. And as soon as Zachary is big enough to ride in the trailer I'm sure we'll be back on our bikes pushing Jake to keep up with us.
Pin It