Saturday, April 30, 2011

Cinnamon Rolls: Take Two

Nope, it's not Tuesday. But I asked my family yesterday if they wanted cinnamon rolls. It was more of a rhetorical question. I just like seeing their eyes get wide and hearing the excitement in their voices, "Yes! Yes! Yes!" 

We have a recipe that we love, but I have been dying to make Pioneer Woman's cinnamon rolls. They  claim to be the Best of the Best. I have read about these rolls on multiple blogs. Everyone adores them.

I had to make them.


 And make them I did. I prepared the dough last night and assembled the rolls this morning. My family impatiently waited for them to rise a final time before baking. I'm not so sure that cinnamon rolls are considered the breakfast of champions, but no one seemed to mind.

I really, really wanted to love these. Really. I mean, it's Pioneer Woman's recipe. The maply-coffee flavored icing is one of those things that you're going to either love or hate. It was so good, Jake and I could slurp it through a straw. Leighton and Alyssa didn't care for it. Once it was poured on the rolls though, you could barely taste it. The whole thing melded into one flavor. The icing is thin enough to pour and seeps into all the nooks and crannies. Once it all soaked up, it was more of a glaze than the frosting we love.

Don't get me wrong, the rolls were delicious. They reminded me of coffee cake or a cinnamon roll doughnut. As far as good ol' cinnamon rolls though, everyone asked me to stick with our usual recipe.

If it ain't broke, don't fix it.
Pin It

Pantry Surprise 4/30/11

This morning, instead of a toy, I was surprised to find the baby in the pantry. He has learned to drag the step stool to where he wants to be. He will even grab a basket or box and flip it upside down to climb up if the step stool is not around. This new-found ability to reach higher levels has caused little Zachy to get into even more mischief!


Pin It

Thursday, April 28, 2011

The Curiosity Files: Cicada-Killing Wasp Review

We had the opportunity to review The Curiosity Files: Cicada-Killing Wasp E-Book from The Old Schoolhouse.  I have to admit, I was slightly disappointed when I realized that it is an e-book. I am a tangible book lover. I love the feel of the pages in my hands. I love being able to flip through the book and glance at the pictures. I love the smell of the paper. An e-book offers none of those things. That is why I do not own a Kindle or a Nook. Technology. Sheesh.


I soon realized the benefits of the e-book though. While this particular book is very intriguing and is packed full of fascinating information and “Everything You Never Wanted to Know About the Cicada-Killing Wasp,” we found ourselves checking other websites to continue our study of the cicada-killing wasp and also the cicada itself. We found pictures and videos (like this one of the cicada singing its song. So cool!) of the wasps. The convenience of already being on the computer gave us the opportunity to delve into this topic.

The book is written in  conversation style by Professor Ana Lyze, (clever, huh?) Expert in Outlandish Oddities.  It's geared for children 8-13, though my 5-year-old found it enthralling. When a child starts telling everybody everything he's learned about these insects, you know the book's a winner!


 Cicada-Killing Wasp will keep your kids occupied answering questions like these:
  • Okay, they are cicada killers, but what is really significant about them?
  • How can you spot one of these scary wasps? How big are they? 
  • How does the cicada killer’s life cycle mirror that of its prey?
  • Do these “pests” have a beneficial side? 
  • How are the male and female roles very different?
  • What and who are their enemies?
  • In what unique way are the newly paralyzed cicadas used?
  • What great truths can we grasp from the Bible?
  • And a whole lot more!

I was also impressed by all the subjects included in this book. I assumed it would teach science. I did not expect sections dealing with Bible, math, history, and crafts to name a few. There is even a recipe for Cicada-killing wasp snacks! Jake really enjoyed finding photos of the wasps and using his markers to make the coloring pages look exactly like them. He also had fun being a wasp and "stinging and paralyzing" me  and trying to drag me across the house back to his burrow. It really gave him (and me!) a better perspective of the difficulties the wasps have in carrying the cicadas home.

The only negative thing I can say is that there are no pictures of the crafts. I like to see the final product. That's how I choose recipes out of cookbooks or order off a menu at a restaurant. I'm a visual person. All the time, Leighton will explain something to me, and I'll say, "Just show me." 

The great thing about it? There are more! The Curiosity Files have other topics like Zombie Fire Ants and Quicksand. The regular price of a book in this series is $6.95. Currently, there are a few titles on sale for only $1.00 a piece! We enjoyed this book so much, we already purchased another one. Next week we start our study on the dung beetle. I'm just glad the book's not a scratch-n-sniff! Maybe there's something to be said about e-books after all.

We really enjoyed reviewing this e-book and learning about an insect I had never heard of before. Now,  I can't wait to make a bug pooter and nature journal like the book explains. That is if we can ever get these April Showers to stop.


* I was given a free e-book for my review. The opinions are 100% my own.
Pin It

Wednesday, April 27, 2011

Reusing Workbooks

This is our first year homeschooling, and already we're going through workbook pages like water.  Alyssa likes doing the same page as Jake. She doesn't care that the work is too difficult or that we have only one of that particular page. She just wants to feel included. Sometimes, we'll get new workbooks at the dollar store as a reward. Both kids love it. And I love that they love it. But, I don't really want to constantly be buying new books or copying (not to mention that it's illegal) books or printing 5 million pages off the computer!

What's a homeschooler to do???

A month or so, I came across this idea: use a plastic page-protector. Brilliant! Why didn't I think of that??? I don't know, and frankly, I don't care. I'm just glad I saw it. You simply cut the end off, slide the plastic over a page (either in a book or a single page), write, wipe, and reuse! Not to mention, the kids think it's fun.


I bought them their own special "school" markers. The Crayola dry-erase markers work great. They are low-odor and are small enough for the kids' tiny hands.

Now, when Alyssa wants to do a page in her big brother's book, I hand her a protector and a marker, and watch her draw random pictures all over the page.

And I smile because he'll fill in the answers later. And so will she, much later.
Pin It

Wordless Wednesday: 4/27/11


Pin It

Tasty Tuesday: Chocolate Chip Cookies

My hubby has been begging for weeks for me to make chocolate chip cookies. Weeks, I tell you. I used to make them for him all the time, but since we've started adding recipes to the blog, I've been slacking in the cookie making. His pleas have really gotten stronger since getting a morsel when we made chocolate chip cookie dough ice cream and baked half a batch. I've had an agenda for Easter treats though, and promised him that I would bake him cookies as soon as Easter was over. Guess what? It's over.

Ingredients:
1/2 c rolled oats, finely ground                            3/4 c granulated sugar
2 1/4 c flour                                                          2 tsp vanilla
1 1/2 tsp baking soda                                          1 tsp lemon juice
1/2 tsp salt                                                           2 eggs
1/4 tsp cinnamon                                                 3 c semi-sweet chocolate chips
1 c (2 sticks) butter, softened                              1 1/2 c chopped walnuts
3/4 c firmly packed brown sugar

Directions:
1. Preheat oven to 350° F. 
2. Combine oats, flour, baking soda, salt, and cinnamon in a bowl.
3. In another bowl, cream butter, sugars, vanilla, and lemon juice. Add eggs and beat until fluffy.
4. Stir the flour mixture into the egg mixture, blending well. Add the chocolate chips and walnuts. Mix well.
5. Using 1/4 cup of dough for each cookie, scoop round balls with an ice cream scoop and place 2 1/2 inches apart on baking sheets.
6. Bake until cookies are lightly browned, 16-18 minutes. Transfer to wire rack to cool completely. Store in a sealed container to keep them soft and chewy.

We got an overwhelming amount of candy on Easter Sunday. It's enough to make even Willy Wonka jealous. I used Hershey kisses and chocolate bunnies in place of chocolate chips.


I didn't take all that many pictures this time. Well, that is if you consider 54 not "all that many." I do. You would not believe how many I snap in a single day. I blame my mom. She's the same way. Leighton keeps saying we need a bigger hard drive. I say I just need to delete some of the thousands of pics I'll never use.

Ok, back to the point. My 2 little ones are feverish and coughing, so I wasn't really worried about taking the proper pictures. In fact, I made these cookies by myself. Gasp! I can't remember the last time I baked alone. If Alyssa isn't in the kitchen with me, you know she's not well. Though, she keeps telling me, "Mommy, I feel better," as she sounds like a seal and looks at me through red, puffy eyes.

All that to say, I'm going to skip the nitty-gritty, step-by-step process and just show you the final product.


Now, don't let that picture fool you. These cookies, these monstrous cookies,  bake up big and thick. Usually. Just make sure you have fresh baking soda . . . unless you like flatter cookies, then by all means, use very, very old stuff. I'm so bad about that. I said the other day I needed to replace it. Now I'm kicking myself for forgetting.

They taste great.

They look not-so great.


These babies are huge. Even more so when the baking soda is fresh and they rise like they should. Sigh. I don't usually use the 1/4 cup dough that the recipe calls for. The little tummies of my kiddies would not appreciate it. I use a smaller amount and cut back on the baking time. Also, sometimes I add the walnuts to the cookies. (Not this time.) I'll toss them in my food processor until they are chopped into tiny pieces. It gives the cookies a delicious flavor without the chunk of nut. No one complains when they're added because they don't even notice.

I made a double batch: one to bake now and one to freeze. Next time Leighton wants cookies and I have a predetermined baking schedule, I can easily pull them out and bake.  Now my poor hubby won't be deprived of his beloved cookies for so long!

There are a couple different ways to freeze cookie dough. One is to make individual balls and freeze on a cookie sheet or mini-muffin pan before transferring to a freezer bag. Instead, I refrigerated  the dough, shaped it into a log, wrapped it in wax paper, and put it in a freezer bag.

My loaf is more the size of a bread loaf. Either we'll have big cookies or I'll cut each slice in half.


Oh, here's one more tip for assembling the dough: Do not make cookies in front of an open window, especially on a windy day. Unless you find the sight of flour blowing all around your kitchen soothing . . . Not that I know from experience or anything. Ahem.

Pin It

Monday, April 25, 2011

Amish Friendship Bread

The Amish are known for their beautiful handmade furniture, their ornate quilts, and their simple lifestyle. While we have no Amish in our area, every now and then a starter bag of their Friendship Bread gets passed around. Not only is it delicious, it's fun to share with friends. I received a bag from my neighbor a couple weeks ago and was so excited. It's been a few years since I've made it. I've said how much I love quick breads. This one doesn't disappoint. 

The recipe is a typical sourdough that ferments over a period of 10 days. On days, 6 and 10, you add ingredients to grow your starter. By the end, you'll have enough for 4 batches, or 8 loaves. This is why it's called friendship bread. Who needs 8 loaves at a time? Although, I'm sure my family could handle it.


Amish Friendship Bread Recipe
Please Note: DO NOT use any type of metal spoon or bowl for mixing. DO NOT refrigerate. It is normal for the batter to rise and ferment.

Day 1 - Do nothing.
Day 2 - Mash the bag.
Day 3 - Mash the bag.
Day 4 - Mash the bag.
Day 5 - Mash the bag.
Day 6 - Add 1 cup flour, 1 cup sugar, 1 cup milk. Mash the bag.
Day 7 - Mash the bag.
Day 8 - Mash the bag.
Day 9 - Mash the bag.
Day 10 - Follow the directions below:

   1. Pour the entire bag into a nonmetal bowl. Add 1 1/2 cup flour, 1 1/2 cup sugar, 1 1/2 cup milk.
   2. Measure out 4 separate batters of 1 cup each into 4 1-gallon Ziploc bags.
   3. Keep one of the bags for yourself, and give the other bags to 3 friends along with the recipe.
   4. To the remaining batter in a bowl add the following:

3 eggs
1 cup oil                                         
1/2 cup milk                                             
1 cup sugar                                             
1/2 teaspoon vanilla                                 
2 teaspoons cinnamon                           
1 1/2 teaspoons baking powder
1/2 teaspoon salt
1/2 teaspoon baking soda
2 cups flour
1-2 boxes instant pudding (any flavor)
1 cup nuts and 1 cup raisins (optional)

In a separate bowl, mix an additional 2 tablespoons sugar and 1 teaspoon cinnamon. Sprinkle half of it in 2 greased loaf pans. Pour the batter evenly into the pans and sprinkle the remaining cinnamon-sugar mixture on the top. Bake at 325° F for one hour or until the bread loosens evenly from the sides and a toothpick inserted in the center of the bread comes out clean.


It was an interesting process with the kids. Jake hated coming near the bag since it stinks. It is sourdough after all, though there's so much sugar in it you can't tell after it's baked. Zac, on the other hand, wanted to eat it every time I let him hold the bag. On day 6, Alyssa tipped it upside down and squeezed a cupful right out the top. Thankfully, she was still sitting on the counter. The kitchen smelled lovely after that.

That's ok. We can handle the smell when the end result is something so delicious.


I did keep a bag of starter. In another 6 days, we'll be baking again. There are so many variations for this batter. Blueberry. Cappuccino. Cinnamon rolls. Brownies. Cherry-pistachio? Carrot-coconut? No thank you. There are many non-sweet versions too. Sourdough bread and biscuits, pancakes, waffles, cornbread, muffins. If you can think of it, there's a recipe for it. You can also freeze your starter for later use. Simply let thaw on the counter for at least 3 hours before using.

I'm planning to hang on to a starter for a while so I can try some of these. Probably not the cherry-pistachio or the carrot-coconut. So, if you'd like to squish and mash a bag for 10 days, let me know. I'll have 3 more in 6 days, 3 more in 16 days, 3 more in 26 days . . . you get the point. I'll have plenty to share. Just ask! You won't be sorry.

Pin It

Easter Ideas

I meant to get this up before Easter, but like I said in the last post, it was a hectic week. So, here are a few Easter ideas to remember for next year.


Here is a picture of the kids' baskets. Aren't they fun? They're packed full of things like workbooks, reading books, pencils, sandals, shaving cream (great bath time fun!), and toys. Most of it I got for really cheap (See that pink gardening set? Regularly $5.00, paid $0.98. Or that didj game? Regularly $30.00, paid $4.98!) or free (all the candy and Band-aids after coupons or CVS Extra Bucks.) I love checking the clearance sections at stores, especially after holidays. Some of the toys I've been saving since Christmas and before. That way, I can get the kids some nice things without hurting my wallet.

Notice anything unusual about these baskets? No messy Easter grass! That stuff ends up everywhere for weeks. I've used tissue paper in the past, but it doesn't fill up the bottom as well and doesn't look as nice. This year, I filled the bottoms with shirts, socks, and undies. Jake and Alyssa also got aprons for baking and crafting. I had a nice flat surface to work. After that, I placed everything else on top. Not only did it eliminate the messy grass, it gave the kids a fun surprise once they emptied the top. Bonus!

  
We decided to skip the candy/money route for the eggs this year. Instead, I filled the eggs with pieces of a K'nex set. We ended up with 30 eggs. Two dozen had the parts, and six had a piece of candy. Surprisingly, they didn't care anything about the candy eggs! Well, except for Zac. He's not quite old enough for the tiny pieces yet, but already loves chocolate. The other two were so focused on finding all the pieces of the truck. If they found one of the other six, it was tossed to the side. "Oh, it's just candy." Not only did it eliminate the extra candy, it gives them a fun toy to build and play with again and again. Bonus!


These last two pics are the chocolate bowls we made last week. We mixed 8-10 drops of food coloring in 1 teaspoon water. Then, we combined that with 1 cup of shredded coconut in a plastic bag. We put the "grass" in the chocolate bowl along with 3 peanut butter eggs. Add some cellophane and a bow, and you have a cute, little "nest" to give to friends. Jake and Alyssa had fun passing these out at church Easter morning. They're completely edible (once opened!), though the kids dumped the grass out and just ate the candy. In this case, it's all about the presentation. 

Do you have any cute, crafty, thrifty ideas? Leave us a comment. It's never to early to prepare for next year!
Pin It

Theory Thursday: Making Butter

I am just now getting around to posting last week's Theory Thursday. It's been a busy weekend for sure. Actually, the whole past week has been pretty crazy. Leighton worked 70+ hours Monday-Friday, with a couple of 19-hour days. He always works so hard to provide for us . . . just not usually that hard. So, I've been holding down the fort at home by myself. Needless to say, we're glad it's a new week. 

I was having a hard time finding something to do for Theory Thursday when I came across my old Brownie Girl Scout Handbook. Oh, the memories it brought back! Camping, cookies, crafts, among many others. I knew I could find something to do for science. And I was right.

Pour some heavy whipping cream into a glass jar.

Shake . . . shake . . . shake . . . for fifteen minutes.

After chilling in the fridge for one hour, pour off the buttermilk.

Rinse the butter pieces in cold water and enjoy!

I had them try to guess what we were making. As soon as they saw the whipping cream, they guessed ice cream. (You think we make enough of it?) They didn't realize it was butter until they tasted it. They LOVED shaking the cream! They jumped and shook and danced and wiggled . . . . for about a minute. Then Mommy had the chore privilege of shaking it for the remaining fourteen. 

After about seven minutes, it had gotten so thick that there was no more "thumping" sound. It was just a solid mass. At the ten minute mark, it broke up again as the cream was overworked and turning into butter. (You'll remember the process in Leighton's baking post.) My arms were thankful when the timer finally went off.

The kids and I sat down and watched Sleeping Beauty while the butter chilled. Does anyone else find that movie disturbing? The witch is downright terrifying. With a name like Maleficent, you know she's going to be evil. I had to distract Alyssa at certain parts because she's afraid of everything. Oh yeah, this post is about butter . . . 


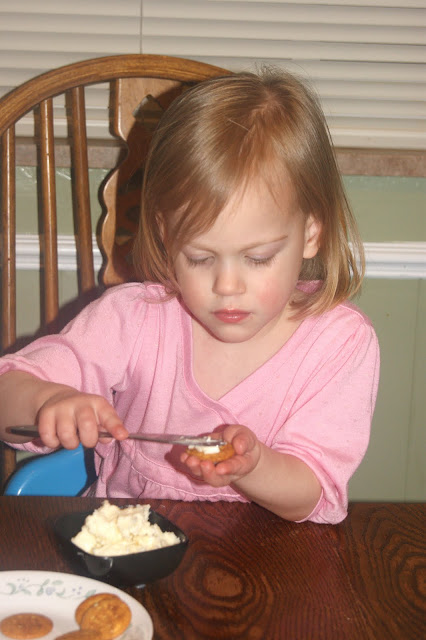
 Alyssa really liked the butter on the crackers. Or on her fingers. She's not picky. She likes anything dippy. Jake is more like his daddy and could live without butter altogether.  

I'm just thankful I can buy butter in the store.
Pin It

Thursday, April 21, 2011

Pantry Surprise 4/21/11

Here I am, minding my own business. I open the pantry to get a snack for Zac. (Big surprise, huh?) Nothing out of the ordinary. I pull down a bag of veggie sticks and remove the clip from the bag. I reach in and find a surprise . . . .


Who knew that McDonald's teamed up with Good Health to put toys in the bags! Prizes are no longer reserved for cereal and cracker jack boxes. The concerning thing though is that little Cabbage Patch doll is a McDonald's toy from when I was a child. Either those sticks are waaaay past their expiration date, or one of my children "forgot" their toy while getting a snack.

Hmm, now that I think about it, they were kinda stale . . . .
Pin It

Wednesday, April 20, 2011

Wordless Wednesday: 4/20/11

Pin It

Tasty Tuesday: Jello Eggs

When we colored Easter eggs on Monday, I mentioned how we were given a couple gifts. Our second one was a JELL-O egg mold. How cool! I had never seen one of these before. Apparently, I live a sheltered life. 

On to the eggs!

Blast the mold with non-stick cooking spray. Snap the mold closed.

Add 1 (3oz) package of jello to 3/4 cup boiling water. Spill some of the powder because obviously you have too much.

Stir until completely dissolved.

Repeat.

Pour the liquid into the spouts at the top of the mold.

If your mold is not completely closed, the liquid will pour out the side.

Pour the liquid jello back into the measuring cup.

Repeat steps 1 and 5, paying close attention to snapping the mold completely closed. Place in the refrigerator to set.

We tried 2 solid eggs of each color and 2 mixed eggs. Apparently, the mold popped opened again before adding the red.

Jiggly, jello-y eggs
I let the jello set for an hour and a half before adding the second color to the 2 mixed eggs. The extra red had hardened on the kitchen counter. I popped it in the microwave before pouring it into the two remaining molds. The one spilled right out the back. The other worked just fine. That is if you only wanted half an egg. The halves did not fuse together like I had hoped. That's ok. Half an egg was perfect for Zachary.

He put in his thumb and pulled out . . . an Easter egg.

This is his first experience with jello. Just a guess, but lime not might be his favorite.

These make great sensory objects for the kids. They had fun holding, squishing, wiggling and eating them. And of course, they thought it was hilarious that there was jello all over the plate. How does that saying go, "One man's spilled jello is another man's treasure"?
Pin It

Tuesday, April 19, 2011

Tasty Tuesday: Chocolate Bowls

I have been looking forward to today for months! Making chocolate bowls to fill for Easter - how cool is that? As today drew near though, I became a little nervous. I am pretty comfortable in the kitchen. I love to cook. I love to bake. I love to let my kids help. This was different though. I've never tried anything like this, anything so delicate. My chocolate experience was limited to fondue, candy molds, covered strawberries, and covered pretzels.  

And I was going to attempt this with a 5-year-old and a 3-year-old? What was I thinking?

Oh yeah, "Chocolate bowl - how cool is that?"

Swirl some melted chocolate on a piece of plastic wrap.

Place the plastic wrap on a fluted metal bowl or tart cup.

Once the chocolate is set, carefully peel off the plastic.
It took a few tries to determine how much chocolate was needed, how thick it should be, and how big of a circle was best. Some of the chocolate gets stuck in folds of the plastic wrap. You have to be very careful to pull it out without breaking the bowl. Also, this is very important: make sure to dampen your work space before putting the plastic down. If you don't, the plastic will move around as you swirl the chocolate and stick to itself. It's not pretty. It doesn't work. Yes, I know from experience.

I have 2 small fluted bowls and 2 large ones. We experimented with other things to fill our time while waiting for the chocolate to harden.

Fill a bowl with chocolate. (It works best of you use one that's a little blurry. It is the bowl that's blurry, you know. Ahem)


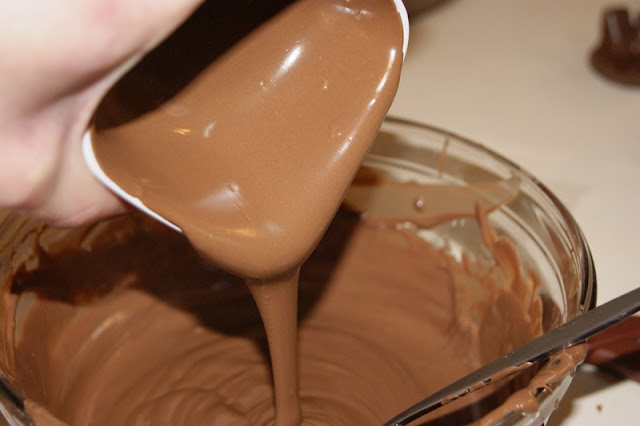
Pour out the chocolate. It's like one of those pointless things we do, like making the bed. Why make it when you're just going to sleep in it again? Because it's what you're supposed to do. And it looks nice . . . So, dump out your chocolate.

Once the chocolate sets and your bowl magically changes colors, flip it upside down to remove your chocolate bowl.

Let me tell you, the first time we did this and the bowl actually fell out, it was the coolest thing! I was kinda surprised that it didn't break or crack. Also, make sure to wipe off any excess chocolate from the rim of the bowl before setting. Otherwise, the bowl will crack. (This one's not from experience. I read it and am passing it along.)

I did this bowl a little differently. I tried the painting method. You pour in some chocolate and use a spoon to spread it around or just spin the bowl in all directions. As you can see, the chocolate was already setting before I had a chance to finish. That's why it has those unsightly blotches.
It popped out beautifully though. Do you see the pattern on the inside of the plastic bowl? That transferred to the outside of the chocolate bowl.  Very cool.

We tried a few other bowls and cups too. I will spare you the broken mess. One nice thing is that you can take those broken pieces and throw them back into the melted chocolate. You get a clean slate!


That is if you can keep the children from eating them all. Every time something broke, they said, "Can I have it? May I eat it?" I'm surprised we had any chocolate to make them in the first place . . . 


That is what I saw every time I looked at them. I would tell them to stop eating it, their tummies were going to hurt, they probably had enough. My concerns were met with, "But it's just so yummy!"


This is a sampling of the bowls we made with 2 bags of Wilton candy melts. We ended up with 1 large bowl, 2 small round bowls, 2 square bowls, 10 large fluted bowls, and 6 small fluted bowls. And enough chocolate in their tummies to last a year.


My favorite quote of the day came from Jake:

"It tastes so good, you just want to eat it! But it looks so cool, you just can't."


*** Update ***

Here's how we used the fluted bowls for Easter gifts. Find all the details on this post


Pin It