Tuesday, January 31, 2012

Tasty Tuesday: Erika's 30th Birthday Cake - Chocolate Turtle Cake


My beautiful wife turned 30 on Saturday. If you've been reading since this time last year you might remember the "joys" of the "Perfect Chocolate Cake". This year there was the same debate over whether or not Erika should bake her own birthday cake. This time I said, "yes" and she said, "no." She picked a cake that wouldn't cause me to curdle any ingredients. The cake this year was much easier than last years, so I went with it and called the kids in the kitchen. I wasn't doing this on my own.

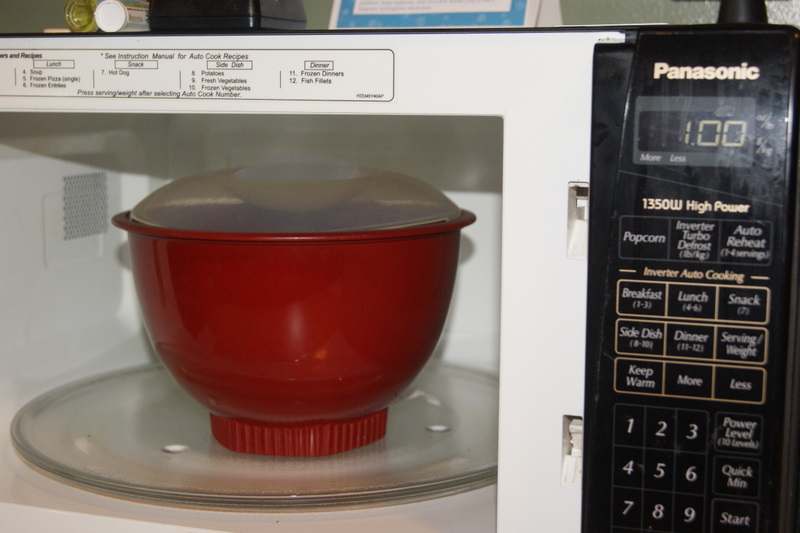
Wait a minute.... I didn't call them in right away. I got all the ingredients ready so the process would go smoothly. This included unwrapping some 14,000 little caramels. Well.... maybe not that many. Closer to 14 oz worth, but that is still like 50 or more. Either way, if you've ever tried to unwrap a bunch of those little things in one go you probably know just how frustrating it can be. After about five of them I began to seek a better way. This is what I came up with:

Click on the picture to read the descriptions.

With that done, I am now ready for help. We started with only the freshest ingredients.


Make cake mix as described on box.


BUT ONLY HALF OF THE MIX GOES IN THE PAN RIGHT NOW! Oh, did I mention, only half of the cake mix goes in the 13x9 pan right now.

While the first half of the cake bakes at 350 for 22 minutes you can make the caramel center. Heat the 14,000,000 caramel cubes you unwrapped on medium heat with the evaporated milk. Keep this moving. In other words, stir constantly. Believe it or not the caramel was just getting to a liquid state when the cake was done in the oven.


Pour the caramel over the freshly baked half-cake. Sprinkle this with the chocolate chips. And then pour the remainder of the cake batter over the top. Pop this back in the oven for another 25-28 minutes. Remove and let cool for 30 minutes. Yes, this is a cake you must remain patient for.


And now, ENJOY! Don't forget the ice cream, you must have the ice cream. A little caramel and chocolate sauce never hurt either.


When we asked Jake what he thought of the cake, he gave it a "thumbs up" and then said, "Times one thousand." I think that means he liked it.

Chocolate Turtle Cake
Ingredients:
1 box Betty Crocker® SuperMoist® devil’s food cake mix       
water, vegetable oil and eggs called for on cake mix box
1 bag (14 oz) caramels
½ cup evaporated milk
1 cup chopped pecans
1 cup (6 oz) semisweet chocolate chips
ice cream or whipped cream, if desired
caramel and chocolate toppings, if desired
chopped pecans, if desired

Directions:
1. Heat oven to 350°F (325°F for dark or nonstick pan). Grease or spray bottom of 13x9-inch pan.
2. Make cake batter as directed on box. Pour half of the batter into pan. Bake 22 minutes. Refrigerate remaining batter.
3. Meanwhile, in 1-quart saucepan, heat caramels and evaporated milk over medium heat, stirring frequently, until caramels are melted. Stir in pecans. Pour caramel mixture over warm cake in pan. Sprinkle with chocolate chips. Spread with remaining batter. Bake 25 to 28 minutes or until cake springs back when lightly touched. Run knife around sides of pan to loosen cake. Cool at least 30 minutes. Serve with ice cream, drizzle with toppings and sprinkle with pecans. Store loosely covered.
Pin It

Make It Monday: Coffee Filter Hearts

It was about time to update our kitchen window with colorful creations. Down came the Christmas-y winter decals and up went our new Valentine hearts. The process was both easy and fun! Two ingredients for a winning craft in our house. 

The inspiration came from our coffee filter butterflies. The kids were a little disappointed that there was no water spraying this time though, but mommy was happy that it didn't make a mess. Maybe next week I'll pick a super messy project to make up for it.


 All you need are a pair of scissors, coffee filters, dot markers, and a couple of cute helpers.


Fold the coffee filter in half and cut out a heart. 


 Fold up the heart any which way you want and dab away with the markers!


Make a pattern, color the entire heart 1 color, or dot random colors everywhere. No matter how you decorate it, you can't go wrong!


If the heart is folded a few times, make sure to turn it over to ensure the color bled all the way through.


It's so much fun, you'll want to make lots and lots of hearts!


But the real fun is in opening the hearts up and seeing the designs you made. We found butterflies, more hearts, letters and faces. Each time, we ooh-ed and aah-ed and the beautiful formations. I admit, I had just as much fun decorating the hearts as the kids did! And they look especially pretty on our window when the sun shines through, not that you can tell by looking at the picture I took after the sun started to go down and the sky became overcast. Oh well, I guess you'll just have to make them and experience their beauty yourself!

And even once the markers are all put away, you can still have fun with the filter scraps . . . 


It's the craft that keeps on giving.

Pin It

Sunday, January 29, 2012

Pantry Suprirse 1/29/12

It's a joke in our house that we have pet squirrels. So often when we open the front door, 1 or 2 (or even up to 5!) squirrels will come running to our house. You can see them coming from down the street, going as fast as their little legs will carry them. When they get to our house, they just sit there looking at us, waiting for food. They are so used to us throwing out stale bread, crackers, pizza, cookies, cake, whatever the kids have left sit out. Sometimes when we leave the house, the squirrels will walk right up to the front door and just look at it. It's like they're saying, "Hey, I heard the door open. Where's the food?" They are trained. 

This is what I found a couple days ago when I was getting the mail:


That is a homemade biscuit (remind me to post the recipe one day!) in the back of our on-the-house mailbox. I have found all sorts of food in there. The squirrels think it's their own, personal pantry.

When I start finding toys in the back of the mailbox, then I'll be concerned.

Pin It

Friday, January 27, 2012

Things That Make Me Smile 1/27/12

This week's smiles are a little different. Ok, a lot different.  In fact, I don't even have a list of things this week. It's not that I didn't smile or that my little ones didn't do or say anything smile-worthy, it's just that, well, I've been lazy. Part of the reason I started this section on the blog is because I've found that if I don't take the time to write down the precious things my kids do, I'll forget them. Like forget within 10 minutes. So often, they'll say something and if I don't stop right then to write it down, I'll be kicking myself and saying, "Now what was that he said? I know it was funny. That's why I'm supposed to write it down!!!" And I have that conversation with myself every time I forget. It's pitiful. 

There were things this week, like Jake pausing the construction of his LEGO creation to help his little brother build the Geo Trax, Alyssa telling me she wanted to live in the water bottle with the soy sauce packet, the little baby kicking my belly so hard one night it woke me up, both Jake and Alyssa asking to play their new reading game (review coming in a few weeks), Zac kissing my belly and telling the baby "I love lou!" 20 times, holding Alyssa and rubbing her back while she slept (poor baby has been so sick), and Leighton coming home from work early one day.  

Sometimes we get so caught up in the every day nitty gritty of living that we forget to stop and remember the little things that make us happy. Make sure to take time today to appreciate those you love.


And if you can't think of anything, just know, today is National Chocolate Cake Day! That'll bring a smile to any face! I'll have to wait until tomorrow to eat my chocolate cake though. Be looking for the post of Leighton and the kids making my cake. I promise, it's not as complicated as last year! And I even promise to behave and stay out of the kitchen! {gasp} It'll be hard, but I can do it. And when I do venture back in there to clean the flour spilled across the counter, wipe up the batter splattered on the cupboards, and wash the many dishes, I even promise to smile.

Pin It

KinderBach - Review

I took piano lessons when I was a kid. I was fairly decent at it, too. What happened? Oh, I got into junior high and became more interested in volleyball and cheerleading. By the time my high school years rolled around, playing the piano was all but forgotten. My mom warned me over and over again that I'd regret quitting my lessons. I'll let you in on a little secret, listen carefully - mom's know what they're talking about! It's true! I don't know how many times I've thought, "Oh, how I wish I could play." Every now and then, I sit down and tickle the old ivories, or at least try to. It's certainly not perfect, but I've retained what I've learned pretty well. I've thought about being diligent in playing again, to get better again, but somehow I never have time. I seem to have lost a few hours in each day. I think with every child you have, you lose 2 hours of the day somehow. I'm down to 18-hour days - there's no time for piano! 

I want to make sure my kids are musically educated. A knowledge of and appreciation for music is very important. I really had wanted to incorporate beginner's music theory into our learning this year. My piano is still at my parents' house though, since there's really no room for it at ours. I know, excuses excuses.

Recently, I was introduced to KinderBach, online piano lessons. How cool is that? And what's even better is that they suggest using a keyboard for the lessons. A keyboard! Why didn't I think of that? The kids love making noise music on my old, little keyboard. I was very excited to start using the program, and with over 240 lessons, there's something for the slightly more advanced pianist as well. Alyssa, my 3-year-old, had no other experience with learning music, so she started with lesson one.


KinderBach incorporates videos, worksheets, music, and cute characters into a fun learning experience. It teaches note reading, rhythm, singing, composition, and music vocabulary. It can be used both at home and in the classroom. Karri Gregor, the creator, talks to the kids on their level and draws them in. Alyssa watches the videos with a smile on her face.


Alyssa has absolutely loved her experience with KinderBach! She feels so grown up that it's her program and that she's learning to play the piano. (The lessons can be used for multiple children, each at their own level, but we've chosen not to use it with our oldest since he's currently interested in learning to play the guitar, and our youngest is, well, too young.) Alyssa's working on week 6 right now, and is no where near playing her first concerto, but she's already learned a lot - and had fun doing it!


KinderBach offers many different purchasing options:
1) Year Membership - $95.88 one-time payment for the year (equivalent to $7.99 a month) 
2) Monthly Membership - $19.99 billed monthly
3) Day Pass - $5.95 to try the program for a single day
4) DVDs - See website for various options

And if that's not good enough, you can currently take advantage of their 40% off clearance sale! You can even try the first 2 lessons for free to see if it fits your family.

If private piano lessons are not in your budget, or if bundling the kids up in the middle of winter to head out to lessons does not sound like fun, check out KinderBach and learn to play the piano online in the warmth and comfort of your own home.


Be sure to stop by the Crew blog and read other reviews HERE.


* I was given the opportunity to try this program in exchange for my honest review. All opinions are my own.

Pin It

Thursday, January 26, 2012

Theory Thursday: Soy Sauce Submarine

 I don't know about you but when I was a kid I always loved playing with stuff that floated in the bathtub. I had this little wooden boat that I played with all the time. My dad had made it for me, it was just a basic boat shape cut from plywood with a dowel sticking out the middle and a piece of material that hung off the dowel as a sail. How many of us threw rocks in any body of water we had the chance to, I still do! We love playing in the water. There is something intriguing about seeing what floats and sinks. How about something that floats and sinks?

All you need is a bottle full of water, Soy sauce packet (or any plastic condiment packet), and a small paper clip or two.


Attach the paper clip to the bottom of packet and insert in the bottle.


It should float at the top of the bottle. If it floats with a lot of the package above the surface of the water add another paper clip or upgrade to a large paper clip. Do yourself a favor though, don't start with a large paper clip. It just might be too heavy and sink. Then you have dump all the water and fish the packet back out. I won't mention how I know this.


With your sauce packet now floating at the surface begin to squeeze the bottle.


Isn't that cool! So.... do you wanna know how it works? We all know that water is less dense than air that is why it "floats" above the water in the bottle. Well the air in the sauce packet keeps the packet afloat. When you squeeze the bottle the air and water have no where to go so something has to give. Since water does not compress as air does the water compresses the air. When the air inside the packet gets compressed to the point at which it is denser than the water outside the packet the packet falls. When you release your squeeze all returns to normal and the packet floats.

Well, don't just watch our video. Go make your own see how hard you have to squeeze the bottle. Can you squeeze hard enough to get the air in the packet to lay the packet down? Or can you get the packet to float in the middle? Make it a game, who can get the packet to float in the middle the longest? Just go try it and have fun!


Pin It

Wednesday, January 25, 2012

Wordless Wednesday 1/25/12


Pin It

Tasty Tuesday: Peanut Butter Cookies with Reese's Pieces

January 24 is National Peanut Butter Day! Did you know there was such a day??? Oh, the wonderful things you learn while homeschooling!  It worked out well that it fell on a Tuesday this year. Of course, that meant that we had to make something using peanut butter. (Trust me, there were no complaints here!) I looked through the archives and to see which pb recipes we've already made. There's mock Girl Scout peanut butter patties (which would be very close to the originals with a little modification), a divine peanut butter cream pie (which is so creamy and peanut buttery, and so delicious), peanut butter bars (which is our all-time favorite dessert), and even something for our outdoor friends.

What I did not find was peanut butter cookies. Sure, we have no bake cookies, that have pb in them, but no traditional peanut butter cookies, where the peanut butter itself is the star.

Don't worry, we remedied the situation.

Start with 2 kinds of sugar, 2 kinds of peanut butter, and butter (you could use 2 kinds if you really want to.)


 Beat it up. It's so much fun, you know.


Add in some eggs. This is still Jake's favorite part. Unfortunately for him, he has to share the experience with his sister. Alyssa has gotten pretty good at cracking eggs, too.


Beat it up again.

Stop to take a taste . . . or two.

Then attempt to stop the kids from eating the whole bowl full.


We had the inconvenience, I mean, joy of having Zac help us this time. He decided that he needed only a 20-minute nap. Making cookies sounded like much more fun than sleeping. 

I was reminded of 2 things:
1) Toddlers are messy. We ended up with a floury mess on the counter, on the floor, all over Alyssa. Some flour did accidentally make it into the bowl.

2) My kitchen is small. Between 3 children and all the ingredients and utensils, there was no room left to maneuver. Every year I ask Leighton for a bigger kitchen for Christmas. I have yet to find one wrapped up under our tree.


Add the dry ingredients to the bowl.

Thankfully, it was not Zac's turn to add the next ingredient. I shudder at the thought of the entire bowl being spilled everywhere.


Then comes the very best part - adding the Reese's Pieces. Just try and add them without sneaking a few tastes. I dare you.  


I admit, I shooed the kids out of the kitchen while I rolled the balls. I knew exactly what would happen if I let my 3 little angels handle the dough - more would end up in their mouths than on the cookie sheets. Zac was upset enough when I put the dough in the fridge. "Hey! Where'd tookies go?" He was ready to make a meal of the unbaked dough.


Use the tines of a fork to make a criss-cross pattern on each cookie. Unlike other cookies, peanut butter ones tend to hold their shape pretty well. In order to not have little ball cookies, you'll need to press down just a bit. 


And this is how they'll look when they're done. They look pretty good, don't they? Let me tell you, they taste even better! The edges are a little crispy with a soft, chewy center. Exactly how I like my cookies. (If you want soft edges, bake a little less.) The combination of the crunchy and creamy peanut butter is perfect since it makes a nice balance, and the nuts are not over-powering. And of course, the addition of the Reese's Pieces is a must! That extra burst of peanut butter really makes these cookies stand out. Eat them with a glass of milk, and you'll be set. You might even want to hide the rest because they'll get eaten pretty quickly!


Don't wait until next National Peanut Butter Day to try these. Make them today! 


Peanut Butter Cookies with Reese's Pieces
Ingredients:
1 c butter                                                                             2 3/4 c all-purpose flour
2 c peanut butter (I used 1 c crunchy, 1 c creamy)             1 tsp baking powder
3/4 c white sugar                                                                1/2 tsp salt
1 c packed brown sugar                                                      1 1/2 tsp baking soda 
1 tsp vanilla                                                                        1 c Reese's Pieces
2 eggs

Directions:
1. Cream together butter, peanut butter and sugars. Beat in eggs and vanilla.
2. In a separate bowl, sift together flour, baking powder, baking soda, and salt. Stir into batter. Stir in Reese's Pieces. Put batter in refrigerator for 1 hour.
3. Roll into 1 1/2 inch balls and put on cookie sheets. Flatten each ball slightly with a fork, making a criss-cross pattern. Bake in a preheated 375 degrees F oven for 8-10 minutes or until cookies begin to brown. Do not over-bake. Let cool on cookie sheets for 5 minutes before transferring to cooling racks to cool completely. Cookies will stiffen as they cool.
Pin It

Monday, January 23, 2012

Pantry Surprise 1/23/12


Either my kids are complete geniuses . . . or just really forgetful.


I found this snack cup sitting helplessly on a pantry self. This leaves me to believe one of three things happened:

1) A child entered the pantry, cup in hand, looking for a snack. Said child got distracted by something amazing, set the cup on the shelf, and left the pantry in a rush.

2) A child entered the pantry, cup in hand, looking for a snack. Said child was told, "You don't need a snack," set the cup on the shelf, and left the pantry in a rush.

3) A child entered the pantry, cup in hand, set the cup on the shelf just so it was readily available for the next time, and left the pantry in a rush.


Just think how much time we could save if we just implemented #3 more often. We could keep the bowls on a shelf next to the cereal, the pasta in the cupboard by the pots, the crackers in the fridge near the cheese, the milk in the pantry by the Oreos, and everything else scattered across the kitchen counters! We could literally shave seconds off each time we needed something in the kitchen.


I tell you, my kids are geniuses!


Pin It

Sunday, January 22, 2012

We Choose Virtues - Review


 "Finally, brethren, whatsoever things are true, whatsoever things are honest, whatsoever things are
just, whatsoever things are pure, whatsoever things are lovely, whatsoever things are of good report; if there be any virtue, and if there be any praise, think on these things."  (Philippians 4:8)


We know the Bible tells us that we're supposed to think on things that are virtuous, but what does that mean? Webster's 1828 dictionary defines virtue as "moral goodness; the practice of moral duties and the abstaining from vice" also "Virtue is nothing but voluntary obedience to truth." That certainly sounds like what I teach and expect of my children. I was pleased to receive We Choose Virtues to aid in the teaching process. It was created to help parents, teachers, and youth workers inspired lasting character into the children they influence.

The Virtue Clue Cards ($5.99) are simple to use. Each card, about the size of a business card, has a virtue, or character trait, on it. It gives an easy-to-understand definition, explains what it is not, and gives a challenge in which to pursue that particular virtue. It's a good tool for any age and comes in a convenient little pouch, small enough to stash in a pocket for easy transporting.


My kids (6 yr and 3 yr) and I have loved using this program. I mean, what's not to love? Teaching my little ones I am diligent, I am helpful, I am perseverant, I am gentle, I am content, I am attentive, I am honest, I am kind, I am self-controlled, I am patient, I am obedient, I am forgiving cannot be a bad thing! Each day, the three of us cuddle up together on the couch and read a card. We discuss the definition in a little more detail. Then, we think of ways in which we all portrayed that virtue or suppressed it recently. We also read about a Bible character who showed that virtue and color a picture. What's been the best part though, is seeing them make an effort to incorporate these character traits in their lives! I love hearing my child say, "I was perseverant!" after completing a hard task. Or if they are not listening, I can ask, "Are you being attentive?" and they stop and listen. Just like the dictionary said, they are learning voluntary obedience to truth. 

More ways to instill these virtues are by using the coloring book ($3.00), family character assessment form (free), Bible verses and heroes list (free), virtue poster, and more. Currently, you can use code VIRTUE15 for 15 % off your shopping cart or code SHIPFREE for free worldwide shipping. Be sure to like We Choose Virtues on Facebook where you can find tips on parenting, leadership, and inspiring lasting virtue.

We've greatly enjoyed learning ways in which to purposely incorporate virtues into our lives and will continue to use these resources to train our children also.


You can find more reviews of We Choose Virtue on the Crew blog HERE.


* I was given a few of these resources in exchange for my honest review. All opinions are my own.
Pin It

Friday, January 20, 2012

Things That Make Me Smile 1/20/12

1. Jake: "I know everything God says is true."

2. Alyssa was wearing a new pair of pajamas that were a little too big. I asked her if she wanted me to roll her sleeves. "Yes," she said, "Will you roll my pant sleeves, too?"

3. Jake: "I spy with my one little eye something skin-color."
Alyssa: "My skin?"
Jake: "No, but that's a good guess."

4. Enjoying a fire with the family before bed.

5. Alyssa: "Daddy! The paint's coming off the roof!"
Leighton: "It's ok. The white part is just snow on the roof."
Alyssa: "Oh, silly me."

6. Jake: "Next time we go camping, we should bring the Wii and Daddy could hook it up in the van so I can play on the way there."
Me: "I don't think camp is far enough away that Daddy needs to hook it up. It needs to be a farther drive than that."
Jake: "What if we go to South Dakota?"

7. Our dinner conversation . . .
Jake: "Can I get a pet snake?"
Me: "No."
Jake: "Well then, can I get some mice and a guillotine so I can put the mice in and chop off their heads?"
Me: "And what would you do with the headless mice?"
Jake: "Cook them for dinner! I've never tried mice before."

8. I was working with Alyssa on words that end with at. After she read the word fat she said, "Just like your tummy is fat!"

9. Jake, looking out the window: "That squirrel's a beast! It's almost big enough to shoot and eat!"
Pin It

Theory Thursday: Popcorn

Since National Nothing Day on Monday, Jake and Alyssa have asked every day, "What national day is today?" They've also told me over and over again just how much fun they had. They were so excited when I told them that January 19 is National Popcorn Day. And what do yo do on National Popcorn Day? Eat popcorn, of course! The more butter, the better! I didn't always have that opinion though. For years, I loved the smell of popcorn; and the smell made me love the thought of eating the popcorn; but I didn't love the actual eating of said popcorn. It always upset my stomach. Always. It was a quick, convenient, and cheap snack to toss a bag in the microwave. It wasn't worth it for me afterwards though. Usually, if Leighton wanted popcorn, I'd just eat something else.

Then one day, we bought something that would change my popcorn eating days forever. While perusing Target, we found a microwave popcorn bowl. You simply pour the unpopped kernels in the bowl, put the lid on, and microwave. We decided to try it since it would produce much healthier popcorn than that which comes in the convenient little bags. Little did we know, that it would solve all my popcorn-induced tummy problems. I can eat it now and enjoy it! We do season ours with a buttery oil and butter-flavored sprinkle, but really, there are so many options for how to prepare it. Half the fun is trying to figure out which one best suits your taste buds! The popcorn is actually cheaper and healthier and just as convenient. Needless to say, we've never reverted back to those unthinkable bags.

Now that my impromptu commercial is over, on to the experiment!


Wednesday night I prepared our materials. I counted out 3 sets of 25 kernels. One set was left on the counter, one was placed in the refrigerator, and the last one was put in the freezer for nearly 24 hours. I asked the kiddos what they thought was going to happen when we popped them. Would the varying temperatures effect the final product? Jake said, "I think the ones in the fridge are going to be light blue when they pop cause it's just a little bit cold. And the ones in the freezer are going to be dark blue cause they're really cold!" Now wouldn't that be cool??? Let's see if he was right . . . 


Each set of kernels was prepared the same way. We poured them in the bowl and placed the lid on top.


Then we microwaved it for exactly 1 minute.


 And watched intently each time.


When one batch was done, we poured the popped corn into a separate bowl. Then we started the process over again.


Once all 3 sets were popped, Jake and Alyssa found the unpopped kernels in each bowl and placed them in other bowls.


Unfortunately, we got no blue popcorn. Bummer! We did discover that the room-temperature kernels had 2 unpopped; the refrigerator ones had 1 unpopped; and the freezer ones had 7 unpopped kernels.

I expected the refrigerator ones to have more unpopped than the room-temp, but it might not have happened for many different reasons. Some kernels are just duds. I suppose to be a true test, we could try the experiment again or use a larger number of kernels for each group. 

Either way, we discussed the results by relating it to being cold ourselves. I explained that when they're playing in the house, they're already warm, so it doesn't take much to get even warmer. But when they're walking from the warm van, through the cold outside, and back into the warm house, it takes a few minutes to get warm again. But, when they're outside playing in the nonexistent snow bitter cold, it takes a long time for them to get warm! It's just like the popcorn. The room-temperature kernels had a greater chance of popping than the ones that had been frozen since they started out warmer before being placed in the hot microwave.

But when all was said and done, all they really wanted to get to the most fun part about the whole process . . .

Eating the popcorn!


Happy National Popcorn Day!


Pin It

Wednesday, January 18, 2012

Wordless Wednesday 1/18/12


Pin It

Tasty Tuesday: Strawberry Fruit Roll-Ups

When my mom asked what I wanted for Christmas, it didn't take me long to suggest a food dehydrator. Our family already eats quite a bit of fruits and veggies, but any way in which I can add more to our diet is always a plus. Besides, this gives me another option for storing our bounty from our garden other than freezing and canning. 

I've been wanting to make fruit roll-ups (fruit leather) for quite sometime. My kids love the store-bought ones, but we don't get them but a few times a year. Homemade ones are much cheaper and much healthier. Who knows how many ingredients are in the processed ones with the cute little pictures on the box. I can tell you how many are in these homemade ones though: one -- fruit! Can't get much better than that. (Though if your fruit needs a little sweetening, you can add honey, agave syrup, or light corn syrup.)

I know winter is not exactly the time to stock up on produce to dehydrate, but I got strawberries for a pretty good deal the other day.  After making and enjoying apple leather last week, we set out to make the strawberry.


 Wash and hull your strawberries.


 Place them in a blender.


 Puree until smooth.


 Pour the strawberry puree onto an oiled fruit roll dehydrator sheet.


 Dehydrate at 135°F until leathery and pliable. (This was a few hours before finished.)


Peel off the dried fruit while it's still warm. Cut, slice, or roll the leather any way you wish. One reason I've been wanting to make this is to use it as cute embellishments for the kiddos lunches. Food just tastes better when it's fun!

The strawberry by itself is very tart. All of us puckered our lips and made silly faces the first time we tried it. After you get over the initial shock though, it's pretty addicting. Next time, I'll try adding another flavor to override the sweetness a little. Also, since I've only made it twice, I'm still trying to find the perfect texture and consistency. This time, I was dehydrating sliced strawberries and bananas at the same time. It definitely lengthened the drying process. I'm thankful I have many months to work out the kinks and become more confident before the big push this summer.

If you have any tips, tricks, or favorite dehydrated suggestions, please share them in the comments below!


* You can also make the leather in the oven. Prepare as stated above. Pour into lined cookie sheet, and bake at lowest oven setting until done, 6-8 hours.
Pin It